Showing posts with label gardening. Show all posts

Monday, April 25, 2016

RRRR.. Radish!


My dad was a huge radish fan, I don't think anyone else in my extended family ate them but him, at least no one I every saw. But my grandmother planted a half of a row every year in staggered plantings, to help stretch the season out,

One of the great things about having a garden between our house and my Grandmothers was that my job was to pick options for dinner, I mean literally pick options for Dinner, digging fresh potatoes, there's a cucumber and a tomato that was just ready or greens that were calling my name. And then just as I was leaving there are the radishes, just waiting for me to pick a couple for his salad. It was a chore and an experience at the same time, one I wouldn't trade.

While I'm still not a fan of radishes, there are a few fans at my house now. So late last summer when I put in beets I also put in a patch of Easter Egg Radishes. The great thing about radishes are how fast they come up. It's almost as quick a wisteria for those of you in the south, but not quite as sneaky.
I had quite a haul and look at those greens!


They were just towing over the poor beets that were planted at the same time!
I personally picked the Easter Egg variety because I wanted the different colors and the large greens. I had recipes for both. This year I'll be planting another crop of these and maybe I'll try the Watermelon Radish, or the real name Chinese Red Meat Radish. I'm hoping they keep their green outer color and pink inner color when they are pickled.


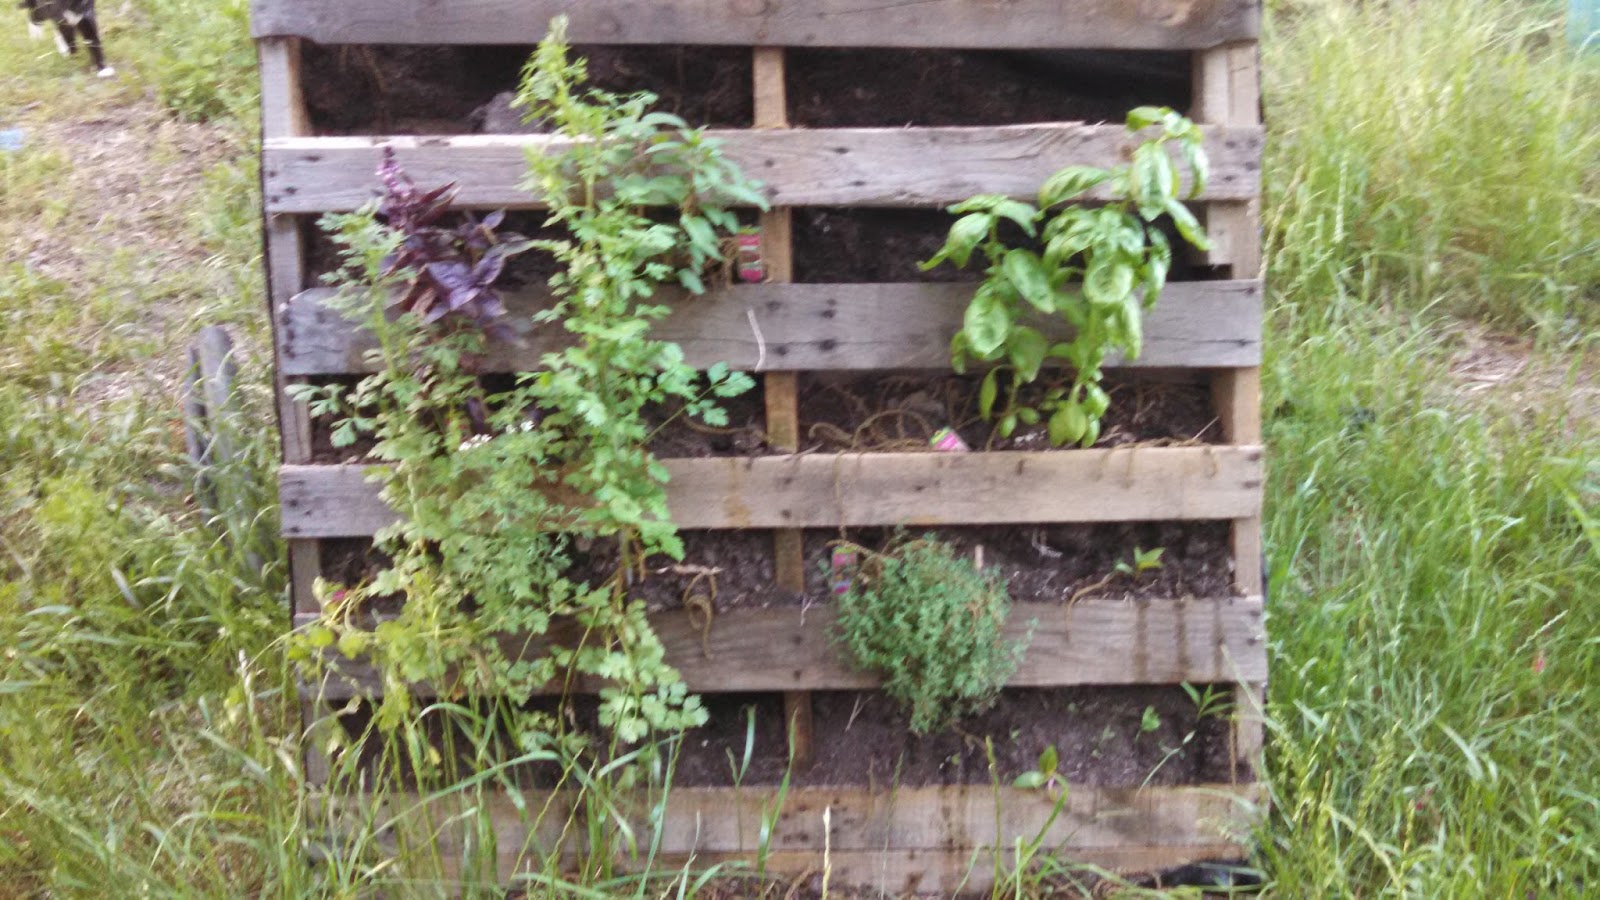
Now for the Science part! That spicy flavor of radishes is due to the chemical compounds found inside, like Glucosinolate which is also found in mustard. As I mentioned before, and as you can see in the picture, they grow very quickly and are great companion plantings for other veggies that grow a bit slower. Most pests avoid the radish greens which helps other plants like broccoli and beets. They enjoy full sun and a soft soil. 

Most often when you think radish you think salad, but I'm hear to tell you that they make an awesome pickle too. I use a pickling brine that is part white vinegar, and part red wine vinegar. Add a few carrots to the mix and if you like heat, slice up a jalapeno, pop it in the fridge for a couple of days and then watch out. It's a great addition to fish tacos and sandwiches. Don't throw away those greens, they make great Kimchi or just saute them if your taste buds aren't up to the heat!

Overall they are a great addition to your garden, stagger the planting over a couple of weeks so that you'll have a nice long harvest. 

Thanks for taking this trip with me and check back soon for more of the A to Z Challenge!

Friday, April 15, 2016

L is for Lemon Grass

Lemongrass is one of those things that the naming is true. It is in the herb family but grows in a large "grassy" clump and the flavor is definitely citrus. Which leads to all kinds of uses in dishes and teas.  It can be grown in the garden or in landscapes in zones 9 and warmer. If you are in cooler climates  you'll want to stick with potted plant that can be brought in over winter or just as an annual.

Interested in growing Lemongrass at home, it can be started from seeds or from shoots. I've found seeds available from Baker Seeds , Johnny's selected seeds and I'm sure there are other companies that carry them. You can also root the plant from stems. If you get a fresh piece go ahead and pull off the outside leaves until you have bare stem. Place it a glass with a couple of inches of water for a couple of days and you should see roots forming in no time. Small leaves will form then you can go ahead and plant in the garden or a pot.
Lemongrass A Garnish Of Tom Yum Goong. (thai Food) Stock Photography - 28801142
image from dreamstock.com
In the garden Lemon grass can grow in a clump from 3 to 5 feet tall. It is a tropical plant and needs full sun, it can be over wintered in warmer climates or kept in a pot and brought in during the cold months. It will need a moist soil, so frequent watering is best.

It's generally used in Asian cuisines but the leaves can also be used to make a tea. It is high in Vitamin C, A, Magnesium and Folic Acid. Lemon Grass tea can be made by seeping one teaspoon of fresh or dried lemongrass leaves in a cup of hot water for 10 minutes. Or you can find it already made into tea bags at specialty stores. The tea has been shown to help arthritis, digestive issues and to lower cholesterol. It has a light lemon taste, unlike many herbal teas have a slightly "weedy" flavor.


Check out these recipes using Lemongrass and then buy a bit extra to add to your garden!


Thanks for stopping by, the crud has caught up to me, I'm blaming it on the weather and this post is a bit late but it's here Today's post is in the works an will be posted today also. So double the reading. Check back for Milkweed for the M post in the A to Z Challenge!

Wednesday, April 13, 2016

Kohlrabi is coming in as your K


Last year I reviewed a book called The Broad Fork by Hugh Acheson and he stated in the book one of the reasons he ended up writing a Seasonal Cook Book was due to a neighbor that wanted to know what he should do with Kohlrabi. I totally understood the problem. We've been growing  it for a few years and selling it at the market and we are often asked the same questions, we promise we're doing better this year giving out better recipes and calling attention to underserved veggies.
Image from Mother Earth News

What is Kohlrabi? I know it's not something that you see much of at the grocery store, much less at restaurants but if you want to add something a bit international to your family's dinner, check it out.
It originated in germany and has also been referred to as a German Cabbage or  a Turnip Cabbage. It is in the Brassica family, like Kale and it is also high in antioxidants and Vitamin C. While it's a strange looking veggie and it takes a bit of work to get to the best parts, it is totally worth it! The small amounts of greens that it grows are eatable, while the main part is the stem, which resembles a turnip growing above ground. The spherical stem has two layers of fibrous materials which will need to be removed since they do not soften noticeably during cooking.

So what am I supposed to do with this crazy looking vegetable? That's the number one question we are posed with at the market. People are interested but just not sure what it is or what in the world to do with it. It does have a mild flavor like broccoli and is best when it's small. Large bulbs can become woody. It is a cool weather plant and most often you'll see it at the Market in late fall and Spring.

Want to grow  your own? It's a very undemanding plant. It grows well with beets, lettuces and Chards. In the Fall direct sow straight into the garden late August for harvest in late September early October. Some frost is fine and will even sweeten the taste some, like collards or turnips. Spring growing depends on our climate. In warmer areas start indoors up to 4 weeks before the last frost, so it can beat the heat. They are great to add color to your cool weather gardens, they come in white and purple varieties.

Ok so now I have them, what do I do with them? Here's a simple side dish recipe with tons of flavor from The Broad Fork.

Steamed Kohlrabi with Shallot and Celery Leaves


  • Two bulbs of Kohlrabi
  • Two sprigs of Thyme
  • 2 Tablespoons unsalted Butter
  • Salt
  • One Shallot cut into thin rings
  • One Tablespoon of sesame seeds
  • 1/4 cup Celery Leaves
Peel the Kohlrabi and cut into 1/2 inch pieces.
Melt the Butter is a sauce pan over medium high heat. When the butter has bubbled add the Kohlrabi cubes. Stir well and then add Shallot, Thyme and Celery Leaves. Reduce heat to medium and add 1/4 cup water and cover to steam. Cook until the Kohlrabi is just tender, about 6 minutes. If any water remains, remove lid so it will evaporate. Salt to taste and add Sesame seeds to garnish.

Serves 4.

Thanks for stopping by and I hope you'll give Kohlrabi a try this spring. I'm taking a turn towards Asian  flavors for Thursday with Lemongrass for the L. 


Monday, April 11, 2016

Indigo for the Dye..or I

Indigo dye plant flowers - Indigofera tinctoria
image from www.wildcolours.co.uk

.

I've been talking about plants for food and plants for companion plantings, but now I want to bring up a plant that has a different use. Indigo is a plant that grows best in warm humid climates and is used as a natural dye. It is a deep blue often most associate with a denim color. It sets well but also fades but keeps it's beautiful blue tone. Natural dyes and food dyes are something I've been learning more about, I'd like to be able to add a few dye options to our garden this year for dying wool and yarn


The dye is extracted from the leaves so it takes a lot of plants to produce a usable amount of dye. Due to this issue in the 1880's the creator of Baeyer Aspirin, Adolf Von Baeyer, researched the chemical composition of Indigo. Later K. Heumann would build on this research to synthesize pathway to produce indigo, within 14 years they would be creating indigo in a lab. Baeyer would go on to earn a Nobel Prize in 1905 for his work. Of course the downside to this is the amount of harsh chemicals that are used to create this popular dye color. Many companies are now researching a more environmentally friendly alternative.

I'm actually getting my seeds from The Woolery, if you are interested in Indigo or other types of dye plants check with your Ag office, some could be considered invasive and can't be shipped to your area. If you can't find Indigo in your area an alternative is Woad.

Indigo is part of the legume family, the same family as beans and alfalfa. It can grow as a shrub up to 5 feet tall and can be annual, biennial or perennial depending on your garden zone. It can also be used in a short season as a cover crop like other legumes, since it will add nitrogen to the soil.

 The best time to harvest the leaves is just before the blooms emerge, only harvesting half so the plant doesn't suffer. The leaves will need to be soaked in water first, then fermented and then lye is added to the resulting mixture to create the dye. Which can be used to dye fabrics and yarn.

If you are interested in dyeing with natural dyes the US Forest Service has this great page that talks about what plants create certain colors and how they have been used in the past.

Thanks for stopping by and be sure to check out the extensive list of bloggers who are writing daily in the A to Z Challenge! Tuesday is J and I'm talking about Jalapeno Peppers in your garden and a great recipe, too!


Thursday, December 10, 2015

Garden Tip Thursday- What Can I Put Into My Compost?

What I should say is "What should I trash and what should I keep for my compost?"

Creating a good compost is easy, think of it as a lasagna and you have to load in layers to get the best result! Turn or stir often to help the process along. By following a few rules of dos and don'ts you'll end up with a great additive for your garden!

Let's start out with the Don'ts since we want to get started on the right path. 

Do not add meat, fat, grease, bones or fish scraps (including scales, tails and heads) these often attract pests such as raccoons and insects. Most composters are not hot enough to kill any bacteria that could be present on these items, especially raw meats, and that's not something you want to come into contact when you are working in the garden..

Any plants from your garden that might have a disease or perennial weeds, the disease can spread to other plants and weed seeds would love nothing better than a new place to dig in.

Human, dog and cat manures are not to be put into a compost that will be used on food crops, due to bacteria that can pass thru the digestive system. I can't imagine using it but I had to put it out there, ya know..

If you are trying to keep your compost as organic or pesticide free as possible, avoid Peach and Banana peels and orange rinds. Unless you are getting an organic version these are the fruit with the most amount of pesticide residue.

Now on to the Do's.  The chemical benefits of compost are generally thought of as Nitrogen and Carbon, the garden and your compost will need a good mix of both.

These Items add Nitrogen to the compost:


Fruit and Veggie Scraps- cooked or raw is fine - Add a bit of dry items, such as a handful
 of leaves or sawdust to keep the moisture levels down.

Grass clippings - like the sawdust add in layers so that it doesn't mat, clumps slow down

 the process. 

Plants- dead or just pulled are fine, but make sure that any weeds have not gone to seed,

 no point in giving them a great place to germinate.

Manure- Chicken and Horse can be used but should be in a newer compost, one that hasn't aged.

 This manure will need to age a bit to be safely used around plants. Alpaca poop can be added anytime.

Coffee grounds and Tea, including the filter and bags, in moderation. Worms love coffee

 grounds so they are good for Vermicomposting too! Regular household amounts are fine, but if 
you are collecting grounds from work or in large quantities you might want to limit the grounds total
 to a quarter of the total pile.

These Items add Carbon to the Compost:


Yard Waste such as Leaves, Branches, Bush Prunings are great to add to your compost as dry items,

 and work best when either shredded or chopped into small pieces. They decompose at slower rate
 but the smaller the pieces the faster the process.

Straw, Pine Needles and Hay, are also good sources of carbon but make sure that you are using a hay

 that doesn't have seeds, you might end up with a crop of grain.

Paper and Cardboard when added to compost should be shredded or at least torn into small pieces.
This will help keep it from clumping up. Avoid using the colored/shiny Ad inserts, they don't break down
as quickly as normal newsprint, so just add them into the normal recycling bin.

Do you have a wood worker in the family, like me? Saw Dust is something that can be added but my

 advise is to add it sparingly or in thin layers so it won't clump. Kinda like cat litter is supposed to do
 when it gets wet.
 I will say we use  sawdust pellets in the chicken coops that soaks up wet droppings and goes from pellet
 to dust. When we turn the piles we always add a few shovelfulls to our compost, it's a good solutions for 
keeping new pellets in the coops and disposing of the old a bit at a time.

To round out this list, I'm adding one of my favorite options, Dryer Lint. Yes you read that right. 

We normal laundry contains mainly natural fibers, and as much of as I do I hate to throw it away.
So go ahead and add it right into the compost!

So we've talked about the science of composting, the equipment needed and what can safely go into
compost,the last installment on composting is what to do when it doesn't seem to working out the
way you had hoped. 

I've been cleaning up and getting the Jerusalem Artichokes pulled and canned, this week. 
Be on the look out for more information and a great recipe for these old fashioned treats!

Thanks for stopping by!


Thursday, November 19, 2015

Garden Tip Thursday- Compost Basics

Hey, I know as gardeners we are always talking about compost and the benefits of it. I know there are lots of people who are interested in composting and have little or no experience with it, other than buying it in a bag at the big box stores. Others think that they don't have the time, area, or expertise to make a great compost. Or you've tried it and it just didn't work out the way you hoped.

I thought it would be a good idea break down the whole idea of composting. From where and how to compost to what can be composted, and them of course how to use it effectively in your garden.

So you want to compost but it seems more complicated than you originally thought. You love the idea that your kitchen waste won't be going to the landfill but it's so much more than that! You don't want to end up with a mess that you can't use or that just seems  to not be breaking down and you're left with a horrible buggy mess. I've seen it at friend's houses, they have great intentions and it's not a difficult process but to get a good result you have to follow a few guidelines.

 There are tons of sites telling you what to do and what not to do but how about kinds of compost to start with. Then you can figure out what actually suits your space and your waste.

Composting at it's main point is about recycling, turning waste into a great soil additive. Nature does it every day.  Organic materials in forest and our yards are processed everyday by the weather, fungus, bacteria and insects, and is turned into a beneficial component of soil.

Aerobic or Anaerobic Composting, which works best? Aerobic composting is done with oxygen, generally above ground or in a holding container that has air circulation. Anaerobic is done by microorganisms that don't need oxygen to survive and is generally considered as pit composting.

Determining which is best for you depends on what you have available and how quickly you want to be able to use your compost.

 Are you working on a new garden space, have plenty of time, or can't leave a pile of what could be smelly scraps next to your neighbors fence? Then a Anaerobic or pit compost would work best for you. And if you have the time to wait it's the easiest option. Dig a pit or trench in the area that can be left alone and dump in your kitchen scraps, leaves or garden wastes and cover back up with a good layer of soil. And that's it.

If you are constantly composting scraps and waste, looking for a quicker turn around or have the area to keep a pile Aerobic is the choice for you. This can be done just as a pile, confined in an area or with a tumbler. The catch is that the organisms that work this way need oxygen, so to keep the process moving at a good rate you will have to put in a bit of work. Turning the pile completely or stirring often is necessary to keep the air flow into the pile. Also to get air to the bottom you can build your pile on a pallet, this will ensure a steady aeration from the bottom. Another benefit of the Aerobic is the heat that it generates, which will often kill weed seeds before they can sprout or transfer to your garden in the soil.

When a compost pile is ready it should look like and have the consistency of dark brown soil.

Neither way is right or wrong, and both are benefits to your garden, your community and the environment. So pick a type and star composting!

In the next few weeks I'll be talking about types of composters available, what should and should not be composted, different composting methods and getting the right mix to get the best out of your compost. I hope you'll stop by and share your composting knowledge and stories with us!

We are still working on our fall garden, creating plenty of compost and thinking ahead to spring seed starting in the green house!


Thursday, May 28, 2015

May Updates

It seems like I just completed the A to Z Challenge in April and here it is already the last week of May. I'd say I've lost a bit of time but all I have to do it step outside and see where it went.

During the A to Z Challenge I did manage to post a theme, (gardening), post everyday and made fairly good use of the letter of the day. The one thing missing was being able to visit every blog at least once during the month. I did hot quite a few  and picked up some new favorites. I'm getting a second chance, with the 2015 Post Challenge road trip. last time I tried to pick blogs that I thought might have a craft or garden theme first then I checked out ones with what I thought was a catchy title. This time I'm working my way down the list from 1 to whatever the last number ends up being.. it's a bit of a work in process right now.

So in that theme I'll go ahead and update you a bit on some of the projects I talked about in April.
Did they work out? Was a it a bust or would I try it again. Check it and out see.

The garden has been planted and it's in full swing. The Umbrella Market stared last week and it was awesome to see our favorite customers again.

I'll start with an update about the Potato Towers.  Despite our later than normal start and the crazy weather we've had the towers are doing great. I even saw a bloom to two the other day!

I think that it's going great so far. It hasn't been much work other than keeping it watered, which I was smarter this year by adding the soaker hoses to the towers. I'll give you a poundage update at harvest time! I'll mark this one as a success and add it to the list for more towers next year. Sweet potato slips are coming on now. I'm wondering if we can do them the same way. There might be a post about that coming soon.

The Pallet herb garden is a so/so project. we got it built but we need to move it to a shady area. Once we get it moved we'll add the rest of the herbs, which are currently residing in pots.


Now that we have worked out the bugs we can write up a tutorial about what not to do..lol. I love the idea and I can't wait to get it moved into the shade and have it full of plants.

I'm always promoting trying something every year in your garden. This year I'm working on Artichokes, real ones not the Jerusalem artichokes that I talked about earlier.  Although those were a "new" product one year too.

These are the  Green Globe variety and we're hoping for a small harvest this year. We are on the edge of the zones for perennial, but we have a plan for over wintering it this fall. Check back for updates!

You can see the kale in the back ground there, I've been busy making Kale Chips with the curly and puppy cookies with the Dino.


 The fuzz butts are about out so I'll be making more soon. I should even share my great recipe for their favorite Carrot, Kale, Cheese Krunchies. I can't tell you how much I love hay for the garden. We are doing the straw bales on the other end of this garden but these are some that were left over from winter crops and we just spread some around the spring plantings. It cuts down on the work and for that I'll take all of the help I can get!

 I'll be working weeding the garden, baking and creating fun jam flavors so to hold you over here's a few more pictures of our fruits that are growing great, so enjoy and check back soon for more ideas, recipes and updates.

Super excited for the plum crop this year. I'm thinking about all of the great flavors of Jam we'll have for the fall!

 And of course my all time favorite is concord grape.


Wednesday, May 6, 2015

Planting Peppers

It's finally time for our peppers to make it into the garden. I say Finally, because it seems like it has been a really drawn out process and I'm ready to see some headway.

Most gardeners will start with a few plants picked up from your local nursery or big box store but if you are planning on a lot of peppers, starting them from seed is your best bet.

We are lucky enough to have a bathroom in the shed that doesn't get much use and it was converted to a mini greenhouse late in January so we could start our Peppers. Yes, we started these seeds in late January. Sounds crazy doesn't it, but peppers are a picky plant and take forever to get started. These are a few weeks into the process. The soil needs to be a good 70 to 80 degrees for them to sprout, so if your trying it be prepared with grow lights and a warming mat. We cheat and use rope lights that I got on clearance after Christmas one year, for under the pots to help warm the soil as well as the lights. We got them up and running and in late March we moved them to the Green house. Of which I of course have no pictures..

The seed package is very misleading for peppers, it says that most peppers will be mature and produce peppers in 60 to 90 days, some can go as long as 130 days. This is from the time it is transplanted, if you are using those seeds from that package, go ahead and add 8 to 10 weeks to that number. I say seed manufactures need to have more truth in advertising. If I have started my first garden, bought seed from a big box store and direct sowed into my garden, I would realistically expect to have peppers in three months.
If your lucky, conditions are great and your chickens don't eat them, this is what your pepper plants will look like in 90 days. No where near ready to fruit.Give them another  90 days and the weather would probably be turning really hot and you might not get a chance for peppers this summer. Not fair at all. Then the gardener feels like they have failed at pepper, which isn't fair to them at all.

 Peppers are one of the few vegetables that we recommend getting from a grower. Let someone else do all the work but remember that you'll still have to wait a while before you enjoy those Jalapeno poppers you have been dreaming about.

Two more tips for you before you plant your peppers into the garden. Peppers like a lightly sandy, well drained soil. And sometimes when peppers are grown in greenhouse or the weather goes up and down and you end up with young plants that are already starting to bloom. Before  you plant them it's best to go ahead and pinch those blooms off. Otherwise the small plant will pour all of it's energy into producing the blooms and fruit. It's better to take them off ,let the plant mature and then it will produce blooms again. This will ensure that you have a healthier plant that will produce larger and healthier peppers even if it takes a bit longer.
These are some of the blooms I had to pick off before planting this week. Hopefully we'll continue to have warm nights, peppers need to have night temperatures drop no lower than 50 degrees. Just last week we dropped into the 40's, so we are going ahead and rolling the dice with Mother Nature.

If you're south of us you could be a bit ahead but this could be very timely if you are north of us. You guys have a bit more time before the pepper planting starts!

Thanks for stopping by. I hope to have some updates on the projects started during the A to Z Challenge last month!


Tuesday, April 21, 2015

Straw Bale Gardening

Today's letter in the A to Z Challenge is S and I'm using it for something we are working on here this year. Straw Bale Gardening, Never heard of it? I'm not surprised, while it's a great idea I'm not really sure it's caught on yet. There is a great book,that you can get, and it's been updated just this year.

It's available on Amazon or maybe at your local Library.

The concept is that you plant directly in to a Straw bale that has been conditioned with fertilizer to compost inside by feeding the bacteria that is already present in the bales. So this is a method that is great for those that want to garden but don't have much space or no yard at all. It is also for those who want a garden but just have clay or rocky soil. The straw bales are like a self contained raised bed with out the hassle of tilling and digging, They are also great for those of us with back problems as the bales are up off of the ground and easier to access for planting and harvesting. And the best part, after a season or two you have a great mulch. The reason we did this was due to the state of the soil we had available. It had been part of a tobacco/cotton field and we just didn't want to plant in that with out a bit of conditioning first. 

The conditioning takes any where from 10 days to two weeks. If you're in a cooler climate you can even use them with row covers to create your own mini green houses. If you have plenty of time you can just keep your bales moist and nature will run it's course or you can speed up the process by adding fertilizer every other day to the top of the bale and then watering it in. The second process will still need to be watered every day. Once you are ready to plant top your bale with a couple of inches of compost or garden soil or using a trowel you can spread the hay and plant directly into the bale with a bit of compost. Once the bales are working well you will be able to plant in the sides as well. There are instructions for using organic fertilizers as well as commercial lawn fertilizers. 

Since they are above the ground they will have a tendency in the beginning to dry out quickly. Drip hoses or soaker hoses work great in this situation. Once the bale is decomposing it will hold a good amount of water, and you can water less often. It is important for the whole process that you don't let them dry out. A word of warning, make sure the bales are where you want them, once they get wet they are very heavy and hard to move,
We've started 300 Tomato Plants!

You can see how the decomp is working in the bales.


And of course you always need a helper in the garden. Bales are great because they keep the dogs out of trouble since they can't step in the plants..lol and it's above the chickens so they leave the plants alone too. 

Along with the book there are lots of sites dedicated to talking about how easy and great these gardens are. Wither you want to grow tomatoes, herbs or greens they work wonders for all kinds of plants. Plant early crops and then reuse them for fall crops. Once they have totally given all they have either rake it up and use it in another garden or leave it in place to nourish the soil underneath.

If you are sourcing your bales it is cheaper and easier to buy directly from the grower, Around here bales can go from 1.00 in the field to 4 or 5.00 from a garden supplier. Still it's much cheaper than building a raised bed and in all reality not everyone who wants to garden has that ability.

Check back in a month or so and we'll update the progress. This is our second year and we couldn't be happier. Let me know if you give it a try we'd love ot hear about other success stories!

Thursday's letter is T and I'll be talking about another option for growing "up"! Thanks for stopping in!