Showing posts with label growing. Show all posts

Monday, April 25, 2016

RRRR.. Radish!


My dad was a huge radish fan, I don't think anyone else in my extended family ate them but him, at least no one I every saw. But my grandmother planted a half of a row every year in staggered plantings, to help stretch the season out,

One of the great things about having a garden between our house and my Grandmothers was that my job was to pick options for dinner, I mean literally pick options for Dinner, digging fresh potatoes, there's a cucumber and a tomato that was just ready or greens that were calling my name. And then just as I was leaving there are the radishes, just waiting for me to pick a couple for his salad. It was a chore and an experience at the same time, one I wouldn't trade.

While I'm still not a fan of radishes, there are a few fans at my house now. So late last summer when I put in beets I also put in a patch of Easter Egg Radishes. The great thing about radishes are how fast they come up. It's almost as quick a wisteria for those of you in the south, but not quite as sneaky.
I had quite a haul and look at those greens!


They were just towing over the poor beets that were planted at the same time!
I personally picked the Easter Egg variety because I wanted the different colors and the large greens. I had recipes for both. This year I'll be planting another crop of these and maybe I'll try the Watermelon Radish, or the real name Chinese Red Meat Radish. I'm hoping they keep their green outer color and pink inner color when they are pickled.


Now for the Science part! That spicy flavor of radishes is due to the chemical compounds found inside, like Glucosinolate which is also found in mustard. As I mentioned before, and as you can see in the picture, they grow very quickly and are great companion plantings for other veggies that grow a bit slower. Most pests avoid the radish greens which helps other plants like broccoli and beets. They enjoy full sun and a soft soil. 

Most often when you think radish you think salad, but I'm hear to tell you that they make an awesome pickle too. I use a pickling brine that is part white vinegar, and part red wine vinegar. Add a few carrots to the mix and if you like heat, slice up a jalapeno, pop it in the fridge for a couple of days and then watch out. It's a great addition to fish tacos and sandwiches. Don't throw away those greens, they make great Kimchi or just saute them if your taste buds aren't up to the heat!

Overall they are a great addition to your garden, stagger the planting over a couple of weeks so that you'll have a nice long harvest. 

Thanks for taking this trip with me and check back soon for more of the A to Z Challenge!

Wednesday, April 6, 2016

Echinacea for the E!


We are back to Herbs today and this is probably one you have heard of. Again I'm going for the double duty plants. This one works as well in your flower bed as well as your garden. Echinacea is even a Biennial which means it regrows for a second year and is a favorite of butterflies, bees, cottage gardeners and medicinal gardeners.

Echinacea or Coneflowers are started from seed and if you are in Northern Climates it's the time to get them started. They can be started in doors or outdoors while it's still cool. They need at least 4 weeks of cool wet weather to help them germinate. Fall planting is best but it they are planted later in the spring, they might not flower the first year.

They do well in full to moderate sun and are often paired with other butterfly attracting plants such as Bee Balms, Phlox and Yarrows. They are drought tolerant,and can be grown in large deep pots, due to their long tap roots. Size and colors vary by variety, they range from purple to yellow and from 1 to 3 feet tall. Their blooms last most of the summer and then in Fall the seed heads add interest to your garden.
Coneflower (Echinacea)
Image from sunset.com
Butterflies and Bees swarm the flowers and birds enjoy the fall seed heads but Echinacea has many uses for people too! Native Americans recognized these plants as a treatment for wounds, but over the years it seemed to fall off the radar for most Americans. But in the 90's it saw a big come back.

Using Cranberry juice for a bladder infection, have a slow healing wound, or hay fever problems, Echinacea is a good alternative for treating these problems. The leaves can be brewed for tea, made into creams or steeped to make tinctures. We as a society are quick to run towards antibiotics for quick relief but every year we hear about the new super bacteria. Maybe we should go back to more natural remedies, being created in a lab to fight one type of bacteria can't compete with something is that is naturally complex.

Interested in making a tincture but the information wasn't passed down from your grandmother and you'd rather have the real thing, rather than buying it from Walmart?
Here's some quick information on making one with Echinacea.

  • You'll need to harvest the flowerheads when they are first starting to flower,
  • Put these fresh clippings in a bowl in the ratio of 1 part plant to 2 parts high proof alcohol.
  • Blend well with a immersion blender
  • Place the mixture a jar or bottle than can be strained easily, in a sunny place for two weeks.
  • After the two weeks strain out the plant material and store the sealed jar or bottle in a cool dark place.
As most herbalists and their sites say be sure of what you are using and make sure to check with a doctor before trying anything new. As with any kind of medical treatment there could be unknown reactions. 

I hope you are enjoying our trek into the world of plants, and I hope you'll stop back by to see what else might be on the list for the A to Z Challenge!

See you in the Garden!!


Thursday, March 31, 2016

Growing Sprouts for Chickens

I've kinda dropped out of the blogging world for a bit but I'm heading into April with the best of Intentions. I've decided to do the A to Z blogging Challenge again this year to get myself back into the swing of writing again. I really do enjoy the writing, the challenge as well as meeting new people and find new awesome blogs!

My getting back into it post is one  that has been brewing around for a while. I was supposed to be a February post, back when the chickens didn't have any greens, other than what I was hiding from them in the garden. Sorry girls, it's still off limits but you have other things to keep you busy now.
I was feeling sorry for them since the pickings for fresh greens was a bit slim, oh they were still getting scraps and their favorites but the foraging just wasn't happening. So I decided to create some foraging opportunities for them.

What is a Spout? A sprout is a whole grain or seed that has been grown with just water. Once a seed has been germinated it is considered a sprout until it reaches 4 inches, after that it is considered Fodder, which is a whole nother concept. Obviously they start out the same way but since Fodder grows longer it runs the risk of growing bacteria and therefore it takes a bit more attention and work.

Are there any benefits to sprouting grains over just regular feed?
I think so and some science backs that up. Our Girls are spoiled and can get into trouble during the colder months so a bit of well placed sprouts can entertain them as well as give them something healthy in their diet. It has also been shown that sprouts are easier to digest and that the sprout it's self has beta-carotene as well as more available nutrients  as compared to the unsprouted grain.

What kind of seeds should I use? I've sprouted grains and beans for our consumptions but I wanted to try something that would interest the mini velociraptors we have in the yard. So I did some research and came up with Scratch and Peck Foods . They have a great variety of grains, suitable for sprouting or just scatter feedings. I picked the 3 Grain Scratch. As you can see below it's non-gmo and organic, which are both important to us. This type includes Barley, Wheat and Oats, all great for sprouting. We don't have a local retailer so I ordered mine from Amazon. It's not the only thing out there and you can try a variety of seeds, grains or beans that work great for chickens.


Here's a view of the grains. We'll have enough for sprouting, and treats for a while!

Is it hard or time consuming? Sprouting grains is an easy task, that really only takes minutes a day for great results. So if you've sprouted before or aren't really sure what I'm talking about this will walk you through some of the basic steps to get started growing a great supplement for your poultry

Do I need a bunch of special equipment or a ton of space? Nope, I use a couple of containers I had on hand, but you can use jars, used berry containers or check out some of the serious sprouting options out there. I kept my on my kitchen table, it gets a good amount of sun, but window sills are great places too. The temps should be between 45 and  70 degrees. 

Ready to get started? Good Deal here we go!

1.The first thing is to take your grains/seeds and soak them in clean water for 8 to 24 hours. Make sure the water covers the grain completely. I soak mine overnight. It's the last thing I do and then when I get up they are ready to go.
2. Getting your containers ready, Pick a container with very small holes or poke holes in the container you plan on using. Not too big because you don't want to loose you seeds when you rinse. Any size container will do but I recommend smaller containers just because they are easier to handle, and a small amount of seeds will produce a large amount of sprouts.


3.Drain your grains well and spread them into your container 1/4 to 1/2 inch deep.


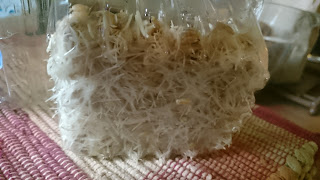
4. The sprouts will need to be watered and drained completely twice a day for 5 to 6 days. At which time they will be ready to fed to your poultry! I took my containers and put them in a larger container with water, allowed them to sit for a few minutes and they took them out and left then in the sink to drain.

To give you an idea of what you can look forward to, here is a day by look at my efforts!

Day One

Day Two


Day Three- roots are really growing fast!

Day Four- Sprout Side

Day Six - Let the Feast Begin!

I had a few so I strategically placed them around the yard

And the great part is there is no waste! They eat the entire thing!

I hope this encourages you to grow some sprouts for your Flock, I'll be starting another batch this weekend for our newbies, since they are shut in until they get a bit bigger!
Aww aren't they the cutest?

Thanks for stopping by and remember to check out the A to Z Challenge which starts on the 1st! No Fooling here!. I'm going to be talking about a different kind of Fruit,Veggie or Herb everyday. You might just find something you can't wait to try! 


Thursday, December 10, 2015

Garden Tip Thursday- What Can I Put Into My Compost?

What I should say is "What should I trash and what should I keep for my compost?"

Creating a good compost is easy, think of it as a lasagna and you have to load in layers to get the best result! Turn or stir often to help the process along. By following a few rules of dos and don'ts you'll end up with a great additive for your garden!

Let's start out with the Don'ts since we want to get started on the right path. 

Do not add meat, fat, grease, bones or fish scraps (including scales, tails and heads) these often attract pests such as raccoons and insects. Most composters are not hot enough to kill any bacteria that could be present on these items, especially raw meats, and that's not something you want to come into contact when you are working in the garden..

Any plants from your garden that might have a disease or perennial weeds, the disease can spread to other plants and weed seeds would love nothing better than a new place to dig in.

Human, dog and cat manures are not to be put into a compost that will be used on food crops, due to bacteria that can pass thru the digestive system. I can't imagine using it but I had to put it out there, ya know..

If you are trying to keep your compost as organic or pesticide free as possible, avoid Peach and Banana peels and orange rinds. Unless you are getting an organic version these are the fruit with the most amount of pesticide residue.

Now on to the Do's.  The chemical benefits of compost are generally thought of as Nitrogen and Carbon, the garden and your compost will need a good mix of both.

These Items add Nitrogen to the compost:


Fruit and Veggie Scraps- cooked or raw is fine - Add a bit of dry items, such as a handful
 of leaves or sawdust to keep the moisture levels down.

Grass clippings - like the sawdust add in layers so that it doesn't mat, clumps slow down

 the process. 

Plants- dead or just pulled are fine, but make sure that any weeds have not gone to seed,

 no point in giving them a great place to germinate.

Manure- Chicken and Horse can be used but should be in a newer compost, one that hasn't aged.

 This manure will need to age a bit to be safely used around plants. Alpaca poop can be added anytime.

Coffee grounds and Tea, including the filter and bags, in moderation. Worms love coffee

 grounds so they are good for Vermicomposting too! Regular household amounts are fine, but if 
you are collecting grounds from work or in large quantities you might want to limit the grounds total
 to a quarter of the total pile.

These Items add Carbon to the Compost:


Yard Waste such as Leaves, Branches, Bush Prunings are great to add to your compost as dry items,

 and work best when either shredded or chopped into small pieces. They decompose at slower rate
 but the smaller the pieces the faster the process.

Straw, Pine Needles and Hay, are also good sources of carbon but make sure that you are using a hay

 that doesn't have seeds, you might end up with a crop of grain.

Paper and Cardboard when added to compost should be shredded or at least torn into small pieces.
This will help keep it from clumping up. Avoid using the colored/shiny Ad inserts, they don't break down
as quickly as normal newsprint, so just add them into the normal recycling bin.

Do you have a wood worker in the family, like me? Saw Dust is something that can be added but my

 advise is to add it sparingly or in thin layers so it won't clump. Kinda like cat litter is supposed to do
 when it gets wet.
 I will say we use  sawdust pellets in the chicken coops that soaks up wet droppings and goes from pellet
 to dust. When we turn the piles we always add a few shovelfulls to our compost, it's a good solutions for 
keeping new pellets in the coops and disposing of the old a bit at a time.

To round out this list, I'm adding one of my favorite options, Dryer Lint. Yes you read that right. 

We normal laundry contains mainly natural fibers, and as much of as I do I hate to throw it away.
So go ahead and add it right into the compost!

So we've talked about the science of composting, the equipment needed and what can safely go into
compost,the last installment on composting is what to do when it doesn't seem to working out the
way you had hoped. 

I've been cleaning up and getting the Jerusalem Artichokes pulled and canned, this week. 
Be on the look out for more information and a great recipe for these old fashioned treats!

Thanks for stopping by!


Thursday, September 3, 2015

Garden Tip Thursday- Cover Crops

So you've decided that you won't be planting a fall/winter garden or at least a portion of your garden will not be used this fall. Don't just let it sit, plant a cover crop and give back to the soil!

Cover crops, also called "Green Manure" are a great option for your garden during the fall winter months. Of course there is the benefit of nourishing your soil, replacing vital nitrogen and other nutrients back into your soil that all of the plants took out this year, but there are other advantages that a low on labor and resources, too.Cover crops also help protect the soil from erosion, and keep weeds from establishing themselves. Those two things are great by themselves! And if you are like us and have free range poultry there are cover crops that are good for them too!

Here's where the low labor part comes in. Once you have removed all of your summer plants go ahead and rake up the top layer, making sure you have removed any roots that might have been left behind and spread your seeds by hand or with a spreader. Go back over the plot with the rake and cover with an at least two inches of soil, this will help protect your seeds from the migratory birds and other locals looking for a quick meal. Mist a bit with water if it's been dry and that's it. The latest you want to start most seeds would be about a month out from your first frost, this will ensure that the seeds will get a chance to have a good start before the cold weather sets in. Let it grow until late winter or early spring then depending on what you have planted it can either be mowed and then tilled into the soil or just directly tilled in depending on the length of the stalks. Sounds easy right?

So what are your options for cover crops? Here are a few ideas for you. each garden has it's own needs and weather so check these out or contact your local, garden centers, seed catalogues or the ag office in your area.

There are three main types of crops and each one has a different job.

Legumes: This is your pea and clover category. They will reintroduce nitrogen into your soil. Some varieties will bloom in early spring and the blooms are welcomed by bees venturing out early in the season. Look for Crimson or White Clover, Fava Beans (I keep thinking we should get some just so we can insert the line from Hannibal into conversations), Hairy Vetch and Bell Beans.

Grasses: This is your grain Category, They can be most helpful if you have poor hard soils, since their root systems help break up even clay. They are very cold tolerant and stand up well in northern climates as an overwinter crop. The main benefit from them comes from the crop being tilled back into the soil, which composts easily, returning nutrients back into the soil. Rye, Alfalfa, and Oats are all good options for a cover crop.

Brassicas: This is your "other" category, it includes buckwheat, which isn't wheat at all, Phacelia, which is a type of succulent and oilseed radish. These often have large taproots and can help to increase drainage. Buckwheat has a large broadleaf and is good to help choke out other weeds and is used to help put phosphorus back into the soil.

Don't think you have to stick to one kind of cover crops. Lots of places carry nice selections of premixed seeds. We'll be using a mix of Rye, Red Clover  and maybe Alfalfa in our on used sections this year. Not only will we be helping the soil but we'll give the chickens a place to forage, bring in helpful bugs and in the spring we'll have blooms for the bees.

I have included a list of sites where you can buy seeds, if you don't have a good selection or option in your area. I am including companies that we use but only because we have had good luck with their seeds and we believe in what they do. They have no idea that I recommending them, nor do I get anything in return, except for knowing that maybe we helped someones garden out this winter!

High Mowing Seeds  Nice variety and free shipping

Grow Organic Lots of options and they even have options to help you find the right seeds for your area and problems, from attracting the right bugs to size of plants.

Seven Springs Good option if you are working with a large area.

Southern Exposure Seed Exchange  Great Selection of unique options including lots of varieties of Sorghum

It's strange to be thinking about fall and winter crops now, especially today when it's so hot outside but planning ahead is often the best thing you can do for your gardens! So here's hoping you'll have a great weekend for harvesting and digging in the dirt for a bit longer..

Check back in with us for detailed information about compost hows and whys and more information on growing your own great garden!


Thursday, August 20, 2015

Garden Tip Thursday- Direct Sow for your Fall Garden

Last week we talked about starting seeds but there are also other seeds and bulbs that can be direct sown right into your garden late in the summer.

In northern climates your soil is starting to cool off a bit and it's time to plant your garlic. Hardneck varieties do well with colder winters and the softneck are more adapted to more moderate winters. If your temps are falling a bit it's time to go ahead and get your cloves in a well drained loose soil. If it's warm where you are you still have time to put in your orders for your garlic. Garlic has a long growing season but it's worth the wait. It can often be the last thing you plant in the fall. Hardneck varieties are what we grow even though we have a more moderate winter, because you get the added benefit of scapes. Two products in one! For more on Garlic check out a prior post here.

Beets and other root crops are also a great for a fall garden. The benefit from being directly sown into your garden. Parsnips rutabaga and turnips will give you delicious veggies for those fall stews. Radishes are also good for fall gardens, they have a quick turn around of four weeks, so go ahead and put in a few seeds now and a few seeds later to space out your harvest. Celeriac or Celery root has a longer growing season but can withstand cooler temperature and some light frost,

Beans also have a quick turn around and expect a larger crop than your spring growth due to the reduction in beetles during the fall. Beans are easy to dry for later use. So they make a smart addition to your fall garden as well as to your pantry! Be sure to look for a short season pea, shelling or snap, they freeze well and will definitely be enjoyed when the weather turns cooler.

While you are doing all of this work in the veggie garden make sure that you take a bit of time to plant flower bulbs for the spring, too. Flowers such as crocuses and hyacinths will give bees an early boost as they are coming out of winter.


Each region has a different timing for planting and these are just some suggestions, Check out your local garden centers and see what is available in your area!

Thanks for stopping by next week we'll be talking about saving some seeds from your own garden for use next year. Not only is economical but now you have a seed that has been personalized to your area.

Dig Happy and wear your dirt with pride!

Thursday, May 28, 2015

May Updates

It seems like I just completed the A to Z Challenge in April and here it is already the last week of May. I'd say I've lost a bit of time but all I have to do it step outside and see where it went.

During the A to Z Challenge I did manage to post a theme, (gardening), post everyday and made fairly good use of the letter of the day. The one thing missing was being able to visit every blog at least once during the month. I did hot quite a few  and picked up some new favorites. I'm getting a second chance, with the 2015 Post Challenge road trip. last time I tried to pick blogs that I thought might have a craft or garden theme first then I checked out ones with what I thought was a catchy title. This time I'm working my way down the list from 1 to whatever the last number ends up being.. it's a bit of a work in process right now.

So in that theme I'll go ahead and update you a bit on some of the projects I talked about in April.
Did they work out? Was a it a bust or would I try it again. Check it and out see.

The garden has been planted and it's in full swing. The Umbrella Market stared last week and it was awesome to see our favorite customers again.

I'll start with an update about the Potato Towers.  Despite our later than normal start and the crazy weather we've had the towers are doing great. I even saw a bloom to two the other day!

I think that it's going great so far. It hasn't been much work other than keeping it watered, which I was smarter this year by adding the soaker hoses to the towers. I'll give you a poundage update at harvest time! I'll mark this one as a success and add it to the list for more towers next year. Sweet potato slips are coming on now. I'm wondering if we can do them the same way. There might be a post about that coming soon.

The Pallet herb garden is a so/so project. we got it built but we need to move it to a shady area. Once we get it moved we'll add the rest of the herbs, which are currently residing in pots.


Now that we have worked out the bugs we can write up a tutorial about what not to do..lol. I love the idea and I can't wait to get it moved into the shade and have it full of plants.

I'm always promoting trying something every year in your garden. This year I'm working on Artichokes, real ones not the Jerusalem artichokes that I talked about earlier.  Although those were a "new" product one year too.

These are the  Green Globe variety and we're hoping for a small harvest this year. We are on the edge of the zones for perennial, but we have a plan for over wintering it this fall. Check back for updates!

You can see the kale in the back ground there, I've been busy making Kale Chips with the curly and puppy cookies with the Dino.


 The fuzz butts are about out so I'll be making more soon. I should even share my great recipe for their favorite Carrot, Kale, Cheese Krunchies. I can't tell you how much I love hay for the garden. We are doing the straw bales on the other end of this garden but these are some that were left over from winter crops and we just spread some around the spring plantings. It cuts down on the work and for that I'll take all of the help I can get!

 I'll be working weeding the garden, baking and creating fun jam flavors so to hold you over here's a few more pictures of our fruits that are growing great, so enjoy and check back soon for more ideas, recipes and updates.

Super excited for the plum crop this year. I'm thinking about all of the great flavors of Jam we'll have for the fall!

 And of course my all time favorite is concord grape.


Tuesday, April 21, 2015

Straw Bale Gardening

Today's letter in the A to Z Challenge is S and I'm using it for something we are working on here this year. Straw Bale Gardening, Never heard of it? I'm not surprised, while it's a great idea I'm not really sure it's caught on yet. There is a great book,that you can get, and it's been updated just this year.

It's available on Amazon or maybe at your local Library.

The concept is that you plant directly in to a Straw bale that has been conditioned with fertilizer to compost inside by feeding the bacteria that is already present in the bales. So this is a method that is great for those that want to garden but don't have much space or no yard at all. It is also for those who want a garden but just have clay or rocky soil. The straw bales are like a self contained raised bed with out the hassle of tilling and digging, They are also great for those of us with back problems as the bales are up off of the ground and easier to access for planting and harvesting. And the best part, after a season or two you have a great mulch. The reason we did this was due to the state of the soil we had available. It had been part of a tobacco/cotton field and we just didn't want to plant in that with out a bit of conditioning first. 

The conditioning takes any where from 10 days to two weeks. If you're in a cooler climate you can even use them with row covers to create your own mini green houses. If you have plenty of time you can just keep your bales moist and nature will run it's course or you can speed up the process by adding fertilizer every other day to the top of the bale and then watering it in. The second process will still need to be watered every day. Once you are ready to plant top your bale with a couple of inches of compost or garden soil or using a trowel you can spread the hay and plant directly into the bale with a bit of compost. Once the bales are working well you will be able to plant in the sides as well. There are instructions for using organic fertilizers as well as commercial lawn fertilizers. 

Since they are above the ground they will have a tendency in the beginning to dry out quickly. Drip hoses or soaker hoses work great in this situation. Once the bale is decomposing it will hold a good amount of water, and you can water less often. It is important for the whole process that you don't let them dry out. A word of warning, make sure the bales are where you want them, once they get wet they are very heavy and hard to move,
We've started 300 Tomato Plants!

You can see how the decomp is working in the bales.


And of course you always need a helper in the garden. Bales are great because they keep the dogs out of trouble since they can't step in the plants..lol and it's above the chickens so they leave the plants alone too. 

Along with the book there are lots of sites dedicated to talking about how easy and great these gardens are. Wither you want to grow tomatoes, herbs or greens they work wonders for all kinds of plants. Plant early crops and then reuse them for fall crops. Once they have totally given all they have either rake it up and use it in another garden or leave it in place to nourish the soil underneath.

If you are sourcing your bales it is cheaper and easier to buy directly from the grower, Around here bales can go from 1.00 in the field to 4 or 5.00 from a garden supplier. Still it's much cheaper than building a raised bed and in all reality not everyone who wants to garden has that ability.

Check back in a month or so and we'll update the progress. This is our second year and we couldn't be happier. Let me know if you give it a try we'd love ot hear about other success stories!

Thursday's letter is T and I'll be talking about another option for growing "up"! Thanks for stopping in!