Showing posts with label canning. Show all posts

Tuesday, April 12, 2016

J for Jalapenos, Candied Jalapenos that is..


From Dyes to Peppers, I'm all over the garden this week.
Spring pepper Plants in our Garden
Peppers have gained a huge amount of popularity lately, they aren't just for poppers and nachos anymore.  As far as flavors go the hotter the better and they have been being added to things you wouldn't expect.

Jalapenos fall into what I would consider a middle category, younger peppers can be mild and as they age they become hotter. So if you are looking for the pepper flavor you can generally gage the heat by the age of the pepper. Young peppers are generally uniformly green and smooth, as they age you will see striations on the pepper and them fully ripe or hotter Jalapenos will be red or orange. The heat falls  within a wide range on the Scoville Chart, from 1,000 to 20,000. The majority of the heat in the pepper is found with in the seeds and interior membrane that holds the seeds, These membranes and seeds can be removed to lower the overall heat level of the pepper.

Many varieties of peppers are now available in nurseries and the big box stores but starting your own peppers from seeds can be very rewarding. Seed catalogues are offer more and more varieties with more and more heat each year, so there is something for everyone's palate. Stating Jalapenos is just like starting any other pepper. You'll need a good starting soil and someplace warm. Warmer climates such as South Florida can direct sow peppers but the rest of us aren't as lucky. Pepper seeds are ones that need to be started very early, as early as 10 weeks before the last frost in order to have the plant ready for the normal transplanting season. Som varierities can take 4 to 6 weeks to germinate and others take only a couple, but they all need a very warm area, generally above 70 degrees. You'll want to hold off on transplanting until the night time temps are staying above 50 degrees and the soil has warmed at least 2 inches down. Peppers are slow growers and need the heat to grow properly.

Plant them at least a foot  a part, once they have established themselves expect that they can grow from 2 to 4 feet tall but have a compact spread. They are fairly drought tolerant, and enjoy heat and humidity. They can also be planted in containers due to the compact size. One plant can produce many pounds of peppers that can vary in heat due to when they are picked.

Last year we had bouts of dry and wet but ended up with a huge amount of peppers that lasted well into November because of the very mild fall we experienced.  So since we had such a glut of peppers we went looking for a good way to extend the life of the peppers. We pickled quite a few for sandwiches and other recipes but we had a friend who recommended a pickling them in a vinegar and sugar syrup. These retain their heat but with a slightly sweet offset. We've heard it called Cowboy Candy, we call them Candied Jalapenos and have seen them used in various forms. At our house they are often eaten right out of the jar or with cream cheese and crackers similar to how pepper jelly is eaten around the holidays in our neck of the woods. I'll share our recipe and hopefully it's something you might try later this year when the peppers are on. It is a water bath canning recipe.

You'll Need;

  • 3 lbs of firm Jalapenos 
  • 2 cups of Cider Vinegar
  • 6 cups of Sugar ( I know it sounds like a ton but it's best not to skimp on it)
  • 1/2 teaspoon Celery Seed
  • 3 Teaspoons Granulated Garlic
  • 1/2 teaspoon Turmeric
  • 1 Teaspoon of Red Pepper Flakes
  • 8 1/2 pint (or 4 Pint) Canning Jars and lids 
These peppers can be very hot so it's best to work with gloves while you are cutting and trimming.
Trim the ends of the peppers off and slice into 1/4 of an inch rounds. Then set them aside
In a large pot bring the Vinegar, Sugar, Celery Seeds, Garlic,Turmeric and red pepper flakes to a boil.
Reduce heat and let the mixture simmer for 5 minutes. Then add your peppers to the simmering pot, let it continue to simmer for 4 minutes then bring it up to a boil. 

While it's boiling process your clean jars and lids in hot water. Once the peppers have simmered, some will look more wilted than others and that's okay. Transfer them to the heated jars with a slotted spoon, leaving a 1/4 inch headspace. Bring the liquid back up to Boiling and boil for another 6 minutes. Now transfer the hot liquid carefully to the jars to just cover the peppers. Run a knife along the inside of the jars so any trapped air bubbles can be released. 

Wipe the rims of the jars and place your lids finger tight. Place jars in your canner with at least 2 inches of water over the jars and boil for 10 minutes for 1/2 pints and 15 minutes for pints. Remove from canner and place hot jars on a towel to set overnight. Once they have cooled you'll still want to hold off on popping the jars open for a treat. They need another 2 to 4 weeks to fully come into flavor. It's hard but the wait is well worth it. This recipe can be doubled and trust me when I tell you that you'll be glad you did.

Thanks for following along on my A to Z Journey, Wednesday's letter is K and I'll be exploring ideas for that strange vegetable Kohlrabi, you know you'll want to hear about that!

See you in the Garden!


Saturday, April 2, 2016

Brussels Sprouts for the B!


Ok So I know that Brussel Sprouts are not everyone's favorite veggie, but what do you know about them? And have you tried them Pickled? Hang around and I'll pass along more some information on those flavorful mini cabbages.


So I've decided that B will be for Brussels Sprouts this year and I other than my kiddo I can hear a collective groan. Would you believe that I think these guys have gotten a bad rap from our mothers who boiled them and plopped them unappetizing on our plates when we were young. Brussels Spouts are in the Cabbage family but the way they grow is interesting, most people have only seen the end result, in a plastic bag, a bit wilted in the produce section. Did you know they actually grow on the stalk of the plant. In fact you they are good space savers for your garden. You can get a large harvest in a small space. The sprouts grow as buds along the stem that can grow from 2 to 4 foot tall. Image result for brussels sprouts
Image from Mother Earth News
Like other brassiciaceae they grow best in the fall or early spring, frost often sweetens the flavor. Plant late summer, or late winter for a harvest in 90 to 180 days depending on the weather. The entire stalk can be harvested or the buds can be harvested from the bottom to the top over a period of time.

While they can be boiled, roasted or grilled, our favorite is pickled! I'll even share our favorite recipe with the more adventurous, and as a plus it's easy. This recipe calls for water bath processing but there are others that can just be refrigerated.

We start with about two pounds of sprouts, rinse, trim and cut them in half. Then soak them in a bowl of salted water for 15 minutes, while you are gathering your other supplies and heating your jars.

  • Two pounds should make you 5 pint jars, so you'll need 5 jars, lids and rings
  • 5 cups of water
  • 5 cups of white vinegar
  • 5 cloves of garlic
  • 11/4 teaspoon of red pepper flakes (to be divided)
  • 7 tablespoons of pickling salt

Drain and Rinse the sprouts well. 
In a large pot bring the water, vinegar and salt to a boil, over medium heat until the salt has dissolved. 
Take heated jars out of the canner and add to each jar 1 clove of garlic and 1/4 teaspoon of pepper flakes, and fill each jar with spouts, pack tightly. 
Pour vinegar mixture over the sprouts up to 1/4 of the top, take a knife and run it along the inside of the jars to make sure all air was been expelled.
Wipe the tops of the jars and put on lids and rings. 
Place jars in a canner with at least one inch of water over the top of the jars bring to a boil and process for 10 mins.

Take the jars out of the water and place jars on a towel and cover with a towel to protect from drafts.
Once the jars have cooled, this could take over night or at least several hours, check the tops to make sure that they have sealed.
It's not quite ready yet, you'll need to wait at least another 3 weeks while they sit in a cool dark place.
Once they are ready don't be concerned about the smell when you open them. It's strong but it's normal. Then enjoy, they are great right out of the jar.


Thanks for stopping by and be sure to check out the A to Z Blogging Challenge for all kinds of blogs. I'll be back on Monday with "C"! Until then you can find me in the Garden!

Monday, December 14, 2015

A Taste of the Old South- Pickled Jerusalem Artichokes


We have some really awesome friends who are always sharing seeds and ideas with us, and a couple of years ago they gifted us with a few Jerusalem Artichoke tubers. I wrote a bit more about them back in April in the A to Z challenge, you can check that out here. They are also called Sunchokes and are related to Sunflowers, they grow a very tall stem that tops off with a  daisy or sunflower type flower in clusters. They grow mainly on the eastern seaboard and can be invasive so beware when you plant them.

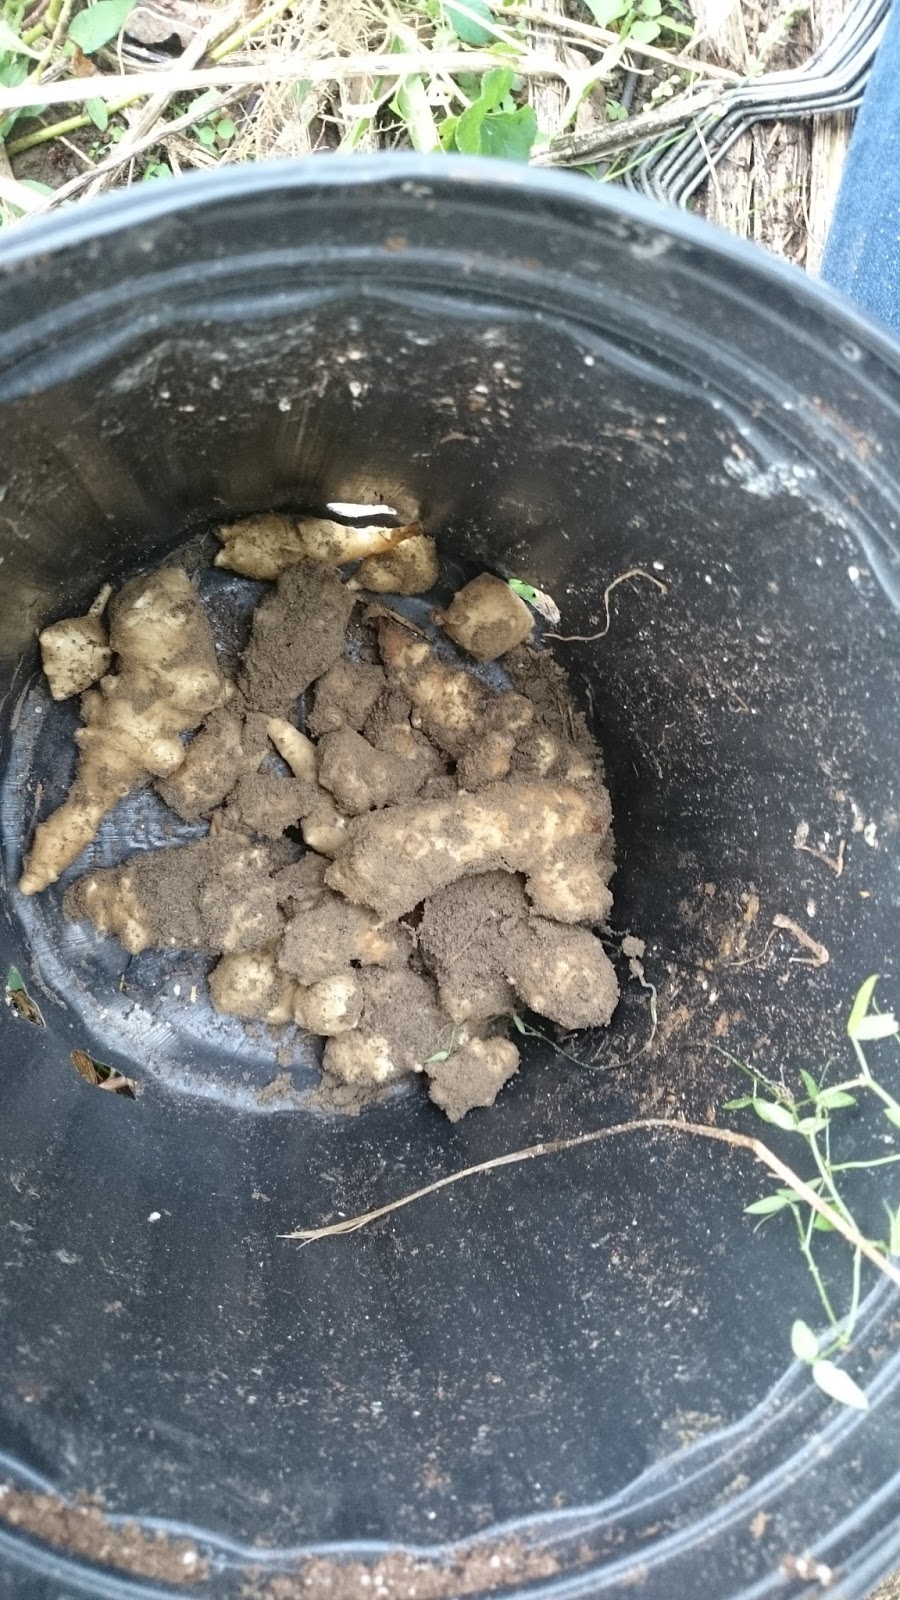
To get the best flavor they say wait to harvest until the first frost. Well we had a bit of a small frost and we were working in the area where we had planted these tubers, so we thought it might be good ideas to dig around and see what we could find..


The first bit of the harvest was a bit less than expected

So we really dug in and the harvest got a bit better

After this I had to help dig so I don't have a picture of the whole harvest but we did end up with more than we expected. We had plenty for mashing and salads and then just enough small for a batch of Pickled. I'm going to walk you through my grandmothers recipe for the pickled version , it takes two days but it is totally worth it. They can also be boiled, roasted or eaten raw.

As you can see from above the hardest part about all of this other than the digging is the cleaning. One wash just isn't going to do it. I swish and washed but those nubbies just hang on to the dirt. 

Some people say that you can just peel them but these are on the small side so I decided to brush them so they could retain their bumpy personality. Of course I didn't have a vegetable brush so I had to make due with an old tooth brush. I knew I keep them on hand for a reason

Much better, don't you think? They're finally ready to go into the brine, which is the easy part.
Never fear, I'll give you the recipe at the end of the post just in case you can get your hands on some,
This is what you end up with early the next morning.

Turmeric is a big part of the recipe and I was glad we decided to plant a bit this year.I'm saving a bit a to plant again this spring. I love have fresh ingredients for our cooking and canning. We'll be adding more herbs to our garden this spring, too. I had posted a picture of the Jerusalem Artichokes to our facebook page asking people to identify it. everyone was convinced that it was ginger, then to really throw them off I posted the Turmeric and no one got that, either. But they loved the finished product.

Here's what we ended up with, we went with some 12 oz that we had laying around and I think it makes a great presentation. I used all of the products shown below for a Relish tray this weekend, Artichokes, Pickled beets, Pickled Brussels Sprouts and Giardiniera, which to me are all rustic country flavors. Most people had never seen any of it before. It was met with a quiet skepticism but soon welcomed by all. I'm glad I can introduce a new generation to old food ideas. 


Finally here's the recipe, 
3 to 4 pounds of Cut Artichokes will make 12 pints

You need to start with the Brine:
1 gallon of water
3 to 4 pounds of cut artichokes (cut them into 1/2 inch bite size pieces)
1 cup of  pickling salt
 Onions (6 to 8 sliced thin) *Optional
1 Tablespoon of turmeric or one small fresh root, sliced

Place Brine in a glass jar and add artichokes,  They should stay in the brine for at least 8 hours,over night if possible.

After the brining time has passed it is time to start the pickling liquid:

3 Tablespoons Mustard seed
2 cups of sugar (or more depending on how sweet you want them)
1 tablespoon whole black peppercorns
2 tablespoons celery seed
2 quarts of White vinegar
1 Tablespoon of turmeric or one small fresh root, sliced

Mix all ingredients in a large stockpot and bring to a boil. While the solution is heating up drain your artichokes and rinse well. 

If you are planning to can these then you will go ahead and sterilize your jars, pack each jar with artichokes and pour hot liquid into jars leaving a 1/2 inch headspace. Hot water bath for 10 minutes. 
Place hot jars in a draft free area, covered until cool. Then place in an out of the way spot for at least a week to allow for the best flavor.

If you are not canning these then remove from the heat and allow the liquid to come down to room temperature. Still Sterilize your jars but pack when cooler. Can be kept in the refrigerator for a couple of weeks, 

Any questions or if I have left out anything please let me know. I appreciate the opportunity to share some of our family recipes that help keep the old flavors from fading away. Now is a great time to find these in your local farmers markets and specialty stores, so grab a couple pounds and enjoy!

Thanks for stopping by!


Wednesday, July 22, 2015

Putting up Beets

We have had a really hot and dry start to our summer this year. We generally get a warm May and a wet June before it turns to really hot July and August. Not so this year. We totally skipped spring and ran straight headlong into summer. May was warm and June had over 20 days in a row of over 95 degree heat! July is not doing any better on the heat front and we are happy to see rain clouds, any aday but Wednesday that is since it's market day.

Having said that we generally get two plantings of Kale, Swish Chard, Bok Choi, Beets and Kolrhabi.
We did for go most of those but we did try another planting of beets, we really do go through a bunch of them. They were looking pretty rough so I decided to pull a few to see where we were. Tiny, that's they were. I had watered but not enough it seems so I decided to take a chance and see what we had and just can them.


So I should have taken a before picture to add to the between and afters, beet greens are quite pretty but it was hot and we're were all looking a bit limp by the time I was done so it was skipped.

I know that beets are one of those things you either love or hate, not much middle ground for these guys. My personal opinion is that while they are very pretty plants and roots, they smell like dirt when you cook them and that just turns me off. BUT to each their own, on that note in cause you are on the pro beet side, I'll share my grandmothers recipe with you. This one I have worked out a bit of the trial and error for you already. She was one who used a bit of this and a handful of that, seriously that's how they are written out. And they are only written out because the female grandchildren (there are only two of us) made a fuss about it. And while I'm at it let me admit that no matter how many times I watched her do it, to this day I can not duplicate her biscuits, (it's super simple I know, but maybe when I'm 80 I'll get the hang of it). I'm southern and it's seriously a crime what I can do to a biscuit.

On to beets..This is a pickled beet recipe and is done with a water bath canner. If you don't have a canner any large pot will work. You'll need one large enough to cover your jars by about an inch of water. My mother never owned a canner but used a large stock pot with a round metal rack on the bottom. Canners are cheap and easy to find if you plan on doing much canning, Check walmart and Target as well as amazon for supplies. Jar lifters and a funnel are two other items that make canning much easier than when my grandmother did it and they are widely available with other canning supplies.

 Gather your supplies,other than the beets you'll probably  have all of this on hand already.

You'll need approx:
 8lbs of beets. The smaller the better, less than 3 inches across is best. Larger beets tend to be fibrous.
1 1/2 tsp of Canning Salt.
2 Cinnamon Sticks (you can use a tablespoon powdered if you'd like)
12 Whole Cloves- about 1tsp
12 Whole Allspice Nuts - about 1 tsp
4 Cups of  White Vinegar (5% Acidity)
2 Cups of Sugar ( Splenda can be substituted if you'd like
2 Cups of Water
 4  Medium Onions- This is optional and you can use more if you're an onion fan


On to Processing 
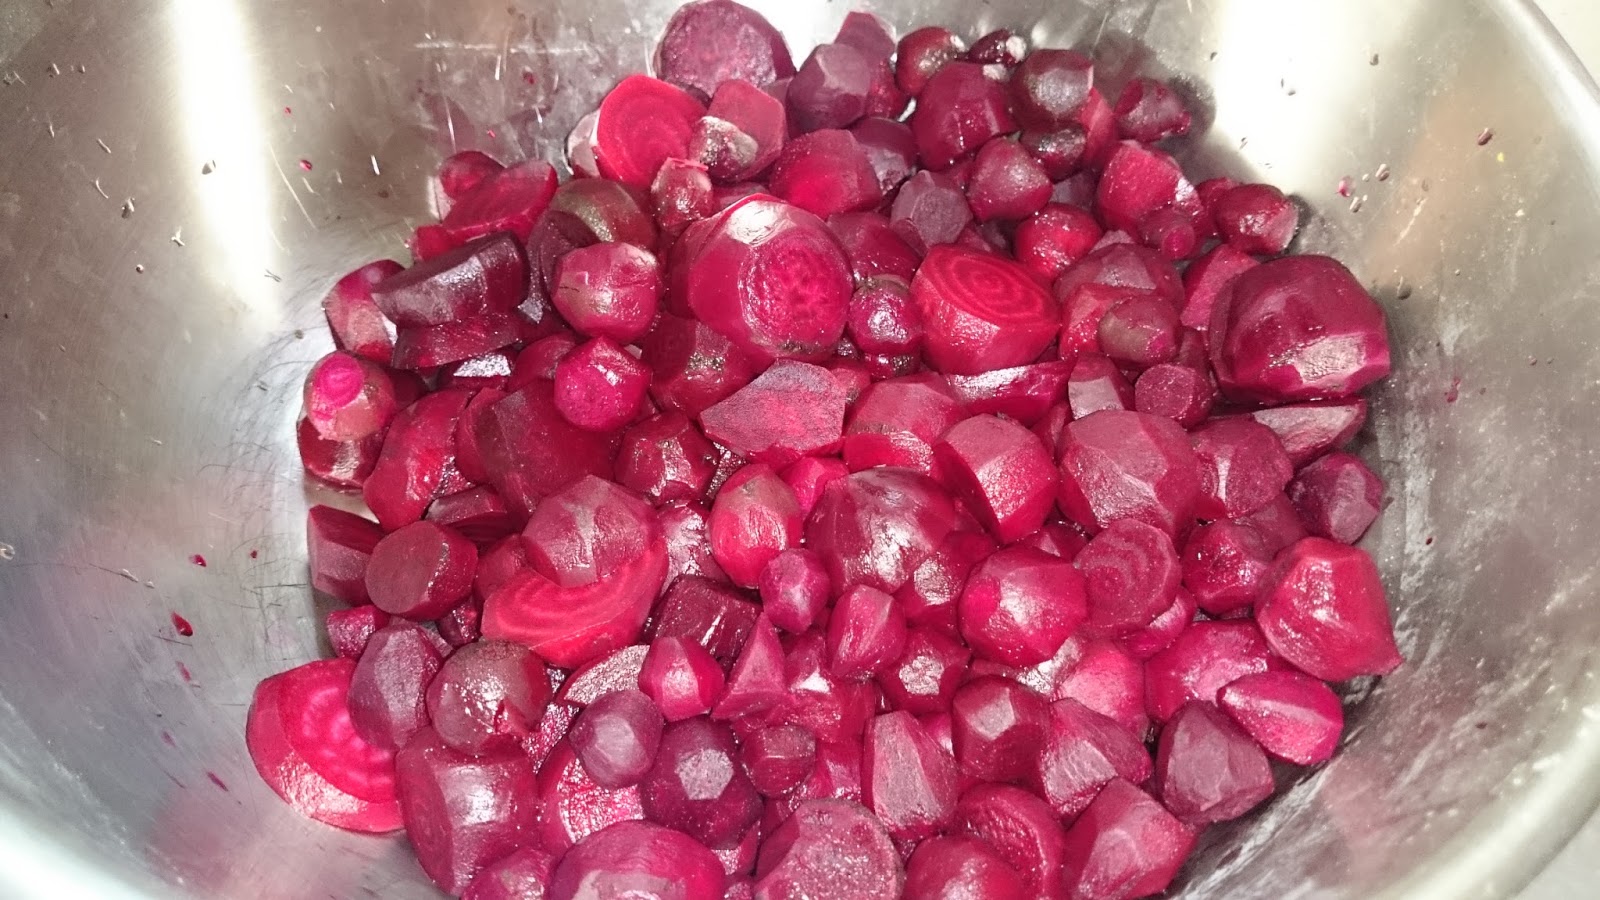
Scrub your beets, they do grow in the ground after all. Trim the greens to an inch or so above the beet, don't cut the top completely off, the beets will "bleed out" when boiled if you do.  Next you'll place your beets in a stock pot with enough water to over them. Boil for 30 minutes or more, they should be fork tender but not soft. Dump the water and place your beets in iced water to stop the cooking process. You'll then want to trim off the tops, peel them or scrap them depending on their size and cut into slices or chunks, your preference. They should look like this:


If you're adding the onions now is the time to get them sliced and ready.

Combine the water, vinegar, salt, spices and sugar in a stock pot and bring it to a boil. Add your Beets and onions if you so chose to the mixture and simmer for 5 minutes. 

This is a great tip that I read about a while back and we use it for lots of things. Find a baby food holder, pictured in the pot below, they are sold at Target and baby supply stores. They will hold a ton of spices, are dishwasher safe and are plastic so it doesn't react to vinegar. You can also use Cheesecloth if you have that handy.

While you are simmering your beets go ahead and heat your jars, we'll be "hot packing" these beets.
Take your jars out and pack the beets only tightly in the jars. Leave a 1/2 inch headspace, generally that's the raised ring on the jar under the screw top. This is used for the expanding liquid during the canning process. After the jars are filled, go ahead and ladle in the hot liquid just enough to cover the beet and leave your headspace. Be sure to wipe your jar rims, this helps to ensure a good seal. Place your lids and screw on your rings finger tight only, don't over tighten.

Place the jars in the canner, and process in boiling water for 30 minutes for pints, if you use Quarts add 5 minutes to your processing time. If you are at higher elevations you will want to add to your time also. I think it is 5 minutes for each 3000 feet you are above sea level. You might want to double check that, we are very low here so I've not had to worry about that.

Once the processing time is up remove your jars and place them in a draft free area, we put them on a table and cover them with a towel. Be Careful they are very hot! We leave them alone for at least 8 hours up to overnight, but we listen for the POP of the lid telling us it has sealed. Give it a week or so to really soak up the flavors and then Enjoy!

 If you have a jar that doesn't seal put it in the fridge and eat over the next few weeks. Canned jars left in a dark place are good for at least a year, but I promise these won't hang around that long.

How pretty are these? I  can't wait to dig in!

Do you have a favorite family recipe you'd like to share. Post your links in the comments Please!
Thanks for stopping by, if you are interested in the crafty side of Our Greene Acre check out my other blog Everything but a Moose. 


Tuesday, April 7, 2015

F is for Figs!

So I may have mentioned this before, Figs are why the farm is what it is today. We bought a piece of a former farm and one of the remainders was this HUGE fig tree. That's it in the picture below, (please ignore the weeds, June Bugs and I do not get along and I refuse to mow under it), it's crazy huge. You can just see a bit of barn poking out behind the right side, it's easily 20 feet high and twice that across. I personally had no idea that fig trees got that big. If you'd like to try to grow one this size, I recommend planting it next to an animal barn and wait 30 years!

We had so many figs the first year we ate till we were sick of them, shared them until our friends begged off of figs, dried them and then we made jam. Plus we shared with the birds, wasps and june bugs, they get the top half.

Surprisingly enough, the jam was a huge hit. (We have a secret ingredient you see) People told us to sell it and lo and behold people bought it! We tried again next year and added peppers to the recipe, and it sold faster than ever. Forward another year and we added a few more flavors and veggies and Our Greene Acre was running at full speed. So I credit this tree and it's wonderful fruit as the catalyst to all of those long nights canning, long days in the sun selling at markets and for all of the wonderful people we've met along the way.

We are located in North Carolina and when you hear about figs they normally come from California but we are proof that they can be grown in other places. We've been told that winter around us is what normally kills a younger tree. We've had good luck in over wintering our offshoots by covering them with tomato cages packed with straw or mulch. Unlike California we have a shorter season and only get a month or two of fruiting.
 We are fairly sure we have Celeste Figs, they are on the smaller side but have a thin skin and sweet tender inside!


I'd had fig newtons and my Father-in-law had a small bush in his yard and that was about the extend of my fig experience. I reached out to Google to learn about figs and I learned a lot of amazing facts. Here's a few


  • Fig Newtons were introduced back in 1892!
  • Figs are low in calories and high in Calcium as well as other vitamins
  • They have no bloom since the "fruit" is actually an inverted "flower"
  • They have a short shelf life but are easily dried and retain their positive health benefits
If you are looking to add fruit to your garden Figs make great additions. They are relatively easy to grow, they like rich organic soil, don't necessarily take up a huge amount of room but give a large harvest, Many types of Figs are available but as a rule don't need another for pollination, unlike plums, peaches and apples.


Look around at your local garden centers for a fig tree and start your own micro farm!

Since you're surely contemplating which fruit tree is best for you check out the A To Z Challenge for more great ideas! Then come back tomorrow to see what starts with "G" and is another great addition to your garden...


Friday, November 7, 2014

The Lost Art of Canning

I just can't tell you how many times I get asked at the market "Did you make all these yourself?" It's not just the canning, although that is where the majority of the questions come from, it's about the crochet and veggies and fruit also. It makes me wonder if people are honestly shocked that and individual still does these things or if I am pimping out my grandmother..lol. I smile and say "Yes, we did and we also grow a majority of what we can or if we don't have room we always source it locally". Sometimes I get a- Wow that's a lot of work or occasionally I get the really awesome customer who says-I wish I knew how to do that, or I miss getting things like that from my Grandmother/Mother. Those are the ones who make it all worth while.

I know I maybe in the minority now, being one who grows and puts up their own foods, much less one who goes so far as to sell it to others. There was a time, not really that long ago that this was common place. I do know that there are small pockets of people who are still carrying on this tradition. I read articles all the time about how seeds sales are increasing every year, that's very encouraging to me. And good for the people who are working behind the scenes to make it happen. Growers, harvesters and the processors. If you are in the market for seeds for next spring our Favorite seed company is Baker Seed Company, www.rareseeds.com. They have a gorgeous catalog with a wide range of seeds from all over the world. No GMO's and many that are organic. Our favorite Local seed company is Sew True Seeds, they are located in Asheville, NC near the arts district, or find them online at www.sewtrueseed.com. All organic, open pollinated seeds, that are great for our area. Not as big of a selection as Baker but well worth the time.

 I see more and more canning jars and implements on the shelves even at the higher end stores. Is it just a fad? Have we figured out that growing and saving our own foods is beneficial to our families? I for one never took home economics, and I'm not sure with all of the budget cuts that it is still available. How do we bring the next generation back to the idea that gardening and preserving those veggies and fruits can be fun? Is it time consuming, yes. Is it tedious, sometimes. Is it worth it, Definitely. Just ask anyone that has used a jar of tomatoes that they canned back in July for that special sauce for their January dinner party. It's a bit of sunshine in the winter months, and it makes every sweaty minute with wrinkled fingers worth it. It's a labor of love for those around you. It's giving back a bit of yourself with every jar that leaves your table.

I for one, along with all of the others in small pockets all over, will make sure that the Art of Canning doesn't die. We'll pass it along to our kids and to your kids if they are interested. We'll sell at markets and to your friends so they can brag to you about the great Pickled Brussels Sprouts/ Squash Pickles/ Peach Butter they got. Hopefully you'll be intrigued enough to come out to the market and support us with your order, ask questions about the process, be aware of where your food comes from and most importantly help keep canning and other handcrafted items from becoming a Lost Art.


Thursday, November 6, 2014

Why I Farm Now


I was one of those lucky kids that got to grow up next door to my maternal grandparents, my parents moved from "town" back to the farm when I was nine and built a house between my grandparents and an uncle. Some days it was awesome and some days I complained loudly about being dragged away from civilization and my friends. My days before had been filled with riding my bike in the neighborhood, taking the quick walk to the library or to Dairy Queen for a dipped cone with my group of friends. All of a sudden I was out in the country, no local anything. But I was lucky enough to live on a loop road, so I was able to ride my bike as much as I wanted with little to no worries about traffic.

While I won't say it was all rosy and wonderful, I can say that I had a different, happier, independent childhood than the friends that lived in town. My parents both worked in town, not on the farm but I did learn about farming. My uncle had cows, my grandmother had  a wonderful garden full of flowers and vegetables, and my grandfather had the all important tractor. We had ponds, woodlands, a small creek and dirt, lots and lots of dirt. I never did catch the elusive "Ground Itch" I was constantly warned about and I am happy to say I still avoid shoes whenever possible.

 My early memories of summer are working right along side my grandmother, in the garden with a old large kitchen spoon. I was allowed to dig and make mud pies to my heart's content, my cousins called me the dirt dobber (which is also a name for a wasp so I never understood that one..lol) and they claimed to find spoons in the garden space many years after I had moved out and away. 

Later I would be consigned to a chair in the yard shelling beans, shucking corn and scraping potatoes for hours. I didn't realize how much of an impression sitting in the shade with my Grandmother, Aunt and other assorted relatives had really made on me. I was given a job, which taught me responsibility,  I learned about growing food and "putting it up", which gave me confidence that I was a valuable helper and best of all I got to listen in on the gossip which made me feel included, as well as gave a bit of leverage over my older cousins..lol. Along with that I learned self sufficiency, we weren't poor nor did we do without but we made sure everything was used to it's fullest. I learned where food comes from and when it's available. I learned how hours in the sun snapping or shelling beans pays off at Christmas when everyone is enjoying the family dinner. The best part was being let loose after the work was done, to go play hide and seek in the cornfields or to splash around in the creek with the crayfish and turtles, and more than often it was just to find a sunny spot to read a book

Late Summer and Early Fall brought harvesting, I still miss the smell of the tobacco curing and the smokehouse in full swing with hams and homemade sausage. Growing and Carving our own pumpkins and not to mention the 100 year old grape vine that was first picked and then pruned back. That meant jelly had to be made and then grapevine wreaths and baskets were made for family and friends for the holidays. Sweet Potatoes and other crops to be harvested by hand and have no doubt my cousins and I were easy and cheap labor. 

In the winter there were always barns to play in and trees to climb. My Mom got ambitious one year and we trekked through the woods until we found the perfect cedar tree, we dug it up and transplanted it in the yard, only because I couldn't stand the idea of it being cut down and then thrown away. Then there is the fact that my grandmother was a professional seamstress and I learned so many crafts from her. We pieced and hand-quilted a quilt for each of her grandchildren for when they got married. She valiantly worked with me on learning to sew, Showed me time and time again how to crochet and  I in turn taught her how to cross stitch. We both decided embroidery was a waste of time.

Then spring finally rolled around and it planting season again. I loved being able to go to the FCX and help pick out the seeds for the year. They sent them home in small brown paper bags and I spent hours counting and sorting seeds when I was small and then being allowed to gently place the seeds in the rows, (that was my personal take on it, I'm sure they were strewn all over and some happened to land in the right spot, but no one complained)

Yes, time makes the memories seem better than they were, at 18 I swore I would never ever shell another bean and I couldn't get out fast enough. Were there time it was awful, yes but those fade with time. Now I'm glad to have had the experience to learn about where my food comes from, understanding that local really is better and that a cool stream on a hot day makes it all worth while.
That's why many years later we continue to garden, make preserves and "Put up" veggies, and sell it to others so that maybe they can catch a glimpse of how great it is to have a connection to a farm including the dirt, the sunshine and the past.

Find a local farm, take a tour, get some veggies and most of all play a bit in the dirt, it will make everything just a bit better.