Friday, December 25, 2015

Happy Howlidays from our Pack to Yours!!


Wishing you a Very Merry Christmas filled with friends, fun, laughter and great food!

Thursday, December 17, 2015

Garden Tip Thursday- Help For Compost Problems


So you've started your compost and it's doing great, Awesome! But you have a few issues or it's not going as great as expected. That's okay too. Let's take a minute or two to talk about problems and their fixes so you can get your compost back on track.

The first one on my list of questions we are asked deals with a the pile has a horrible smell. It could be a rotting smell or an ammonia type smell

The rotting smell is the most common, generally what we see is that there has been a large amount of kitchen scraps added to the pile and they are starting to rot, not decompose, there is a difference, the main issue is that the scraps were thrown into pile in a bunch, not chopped or there wasn't a corresponding amount of dry added at the same time. This one is a fairly easy fix. We recommend adding leaves or straw and mix the pile well. This relates to another issue we hear about, flies or other bugs. They are attracted by the smell and should move on to greener pastures as soon as the stirring is complete.

An Ammonia smell relates to too much nitrogen in your pile. This can come from too much fresh manure being added to the pile or too much of green matter such as a large load of grass clippings that are bunched up. Again go ahead and add brown materials to the pile and then stir generously.

If it's not wastes that are creating the stench it could be that there has been just too much water lately. We suggest the same as above, especially the  mixing it could help to allow some of the water to seep through, since it seems to be holded up into the pile. If your region gets high amounts of rain, be sure that any open pile you create is raised up off the ground, such as on pallets or small logs so that the rain can drain easily and not just pool in the bottom of the pile making a soggy mess.

The second contender is related to the problem above, the pile is just too wet and often this results in a slimy mess.  The best way to get back on track is add dry or absorbent materials, such as leaves, turn it more often so that there is air for the microbes to work.

Then there is the opposite problem the pile is just too dry. This is a problem that is easy to combat, just use a nozzle that will give you a rain effect and wet the pile down. It should only be moist and not saturated with water. As we talked about above, too much water causes it's own problems.

The next to last problem is that something is invading your pile. If you turn over the top layer as you start to stir your pile and you see itty bitty bugs that look like armadillos, we call them roly polys down here but they are actually pill or sow bugs. Pill bugs roll up into a ball hence the name and sow bugs don't. They aren't hurting the compost, but they aren't a good additive to your garden, they enjoy new roots and grow a bit too much to be welcome additions. Once you are ready to use your compost and you find you have they guys still you can spread your compost on a tarp in a sunny area and they will move along to cooler climates. No harm no foul. I admit to being a huge fan of "Roly Polys" so I do my best to help them when I can..lol. Hey some kids just love bugs and we never grow out of it..

Another insect could be ants, in this case your compost is too dry, back to the water you go, they will move on once the pile is a bit moist.

Flies, gnats and fruit flies love spoiled foods, if you are having a flying problem make sure that you aren't just dumping food waste into your pile with out a corresponding dry or brown cover. A handful of soil works wonders.

If your invaders are a bit larger, possums, skunks or raccoons, depending on your area perhaps even a bear, you need to know that they aren't after your compost, they are after the treats hidden within. Tasty fruits, fresh veggies or even meat in some climates. If the problem has just started you can try mixing these items with something like ash or dirt, so they aren't as attractive. If it's an on going problem, the best bet is to convert to a closed system with a lid, so the buffet is closed. Unless it's raccoons, I swear we have some that can get the lid off the trash faster than I can.

One last thing you may see in your compost is volunteer plants, this could be good or bad. Tomatoes and squash are famous for this at our house, these we go ahead and transplant if they are in good shape. If it's a weed, we pull it, break it up or chop it and put it back in the pile.

Are these all the problems  or answers you could possibly run into probably not but hopefully it will get your compost moving back in the right direction. Every region is different and the are issues we have run into on our own or at other local composts. Check with your local Master Gardeners or Ag office for more info.

I hope the last few weeks of compost talk has encouraged you to try your hand at composting, big or small it makes a difference in your garden, the local landfill and the environment. It doesn't take a lot of work, can be done cheaply and the results can be very beneficial.

Check back next week for my last compost post, I'll give you one more idea of what to do with your compost....Make TEA!

Thanks for visiting with us!


Wednesday, December 16, 2015

Almost Wordless Wednesday

We have been gifted with some unseasonably warm weather this week and I thought I would take a second to share. We took a small break from finishing up holiday orders to take the dogs for a run down by the pond early in the morning. All I can say is "Thanks" to Mother Nature for this awesome Holiday Gift. So far I think that the wooly worm had it right!


That water was cold but it didn't stop her...

A little more cautious but the other one totally steered clear..lol


Here's hoping you get a bit of a break in the weather extreme's no matter where you are!

Monday, December 14, 2015

A Taste of the Old South- Pickled Jerusalem Artichokes


We have some really awesome friends who are always sharing seeds and ideas with us, and a couple of years ago they gifted us with a few Jerusalem Artichoke tubers. I wrote a bit more about them back in April in the A to Z challenge, you can check that out here. They are also called Sunchokes and are related to Sunflowers, they grow a very tall stem that tops off with a  daisy or sunflower type flower in clusters. They grow mainly on the eastern seaboard and can be invasive so beware when you plant them.

To get the best flavor they say wait to harvest until the first frost. Well we had a bit of a small frost and we were working in the area where we had planted these tubers, so we thought it might be good ideas to dig around and see what we could find..


The first bit of the harvest was a bit less than expected

So we really dug in and the harvest got a bit better

After this I had to help dig so I don't have a picture of the whole harvest but we did end up with more than we expected. We had plenty for mashing and salads and then just enough small for a batch of Pickled. I'm going to walk you through my grandmothers recipe for the pickled version , it takes two days but it is totally worth it. They can also be boiled, roasted or eaten raw.

As you can see from above the hardest part about all of this other than the digging is the cleaning. One wash just isn't going to do it. I swish and washed but those nubbies just hang on to the dirt. 

Some people say that you can just peel them but these are on the small side so I decided to brush them so they could retain their bumpy personality. Of course I didn't have a vegetable brush so I had to make due with an old tooth brush. I knew I keep them on hand for a reason

Much better, don't you think? They're finally ready to go into the brine, which is the easy part.
Never fear, I'll give you the recipe at the end of the post just in case you can get your hands on some,
This is what you end up with early the next morning.

Turmeric is a big part of the recipe and I was glad we decided to plant a bit this year.I'm saving a bit a to plant again this spring. I love have fresh ingredients for our cooking and canning. We'll be adding more herbs to our garden this spring, too. I had posted a picture of the Jerusalem Artichokes to our facebook page asking people to identify it. everyone was convinced that it was ginger, then to really throw them off I posted the Turmeric and no one got that, either. But they loved the finished product.

Here's what we ended up with, we went with some 12 oz that we had laying around and I think it makes a great presentation. I used all of the products shown below for a Relish tray this weekend, Artichokes, Pickled beets, Pickled Brussels Sprouts and Giardiniera, which to me are all rustic country flavors. Most people had never seen any of it before. It was met with a quiet skepticism but soon welcomed by all. I'm glad I can introduce a new generation to old food ideas. 


Finally here's the recipe, 
3 to 4 pounds of Cut Artichokes will make 12 pints

You need to start with the Brine:
1 gallon of water
3 to 4 pounds of cut artichokes (cut them into 1/2 inch bite size pieces)
1 cup of  pickling salt
 Onions (6 to 8 sliced thin) *Optional
1 Tablespoon of turmeric or one small fresh root, sliced

Place Brine in a glass jar and add artichokes,  They should stay in the brine for at least 8 hours,over night if possible.

After the brining time has passed it is time to start the pickling liquid:

3 Tablespoons Mustard seed
2 cups of sugar (or more depending on how sweet you want them)
1 tablespoon whole black peppercorns
2 tablespoons celery seed
2 quarts of White vinegar
1 Tablespoon of turmeric or one small fresh root, sliced

Mix all ingredients in a large stockpot and bring to a boil. While the solution is heating up drain your artichokes and rinse well. 

If you are planning to can these then you will go ahead and sterilize your jars, pack each jar with artichokes and pour hot liquid into jars leaving a 1/2 inch headspace. Hot water bath for 10 minutes. 
Place hot jars in a draft free area, covered until cool. Then place in an out of the way spot for at least a week to allow for the best flavor.

If you are not canning these then remove from the heat and allow the liquid to come down to room temperature. Still Sterilize your jars but pack when cooler. Can be kept in the refrigerator for a couple of weeks, 

Any questions or if I have left out anything please let me know. I appreciate the opportunity to share some of our family recipes that help keep the old flavors from fading away. Now is a great time to find these in your local farmers markets and specialty stores, so grab a couple pounds and enjoy!

Thanks for stopping by!


Thursday, December 10, 2015

Garden Tip Thursday- What Can I Put Into My Compost?

What I should say is "What should I trash and what should I keep for my compost?"

Creating a good compost is easy, think of it as a lasagna and you have to load in layers to get the best result! Turn or stir often to help the process along. By following a few rules of dos and don'ts you'll end up with a great additive for your garden!

Let's start out with the Don'ts since we want to get started on the right path. 

Do not add meat, fat, grease, bones or fish scraps (including scales, tails and heads) these often attract pests such as raccoons and insects. Most composters are not hot enough to kill any bacteria that could be present on these items, especially raw meats, and that's not something you want to come into contact when you are working in the garden..

Any plants from your garden that might have a disease or perennial weeds, the disease can spread to other plants and weed seeds would love nothing better than a new place to dig in.

Human, dog and cat manures are not to be put into a compost that will be used on food crops, due to bacteria that can pass thru the digestive system. I can't imagine using it but I had to put it out there, ya know..

If you are trying to keep your compost as organic or pesticide free as possible, avoid Peach and Banana peels and orange rinds. Unless you are getting an organic version these are the fruit with the most amount of pesticide residue.

Now on to the Do's.  The chemical benefits of compost are generally thought of as Nitrogen and Carbon, the garden and your compost will need a good mix of both.

These Items add Nitrogen to the compost:


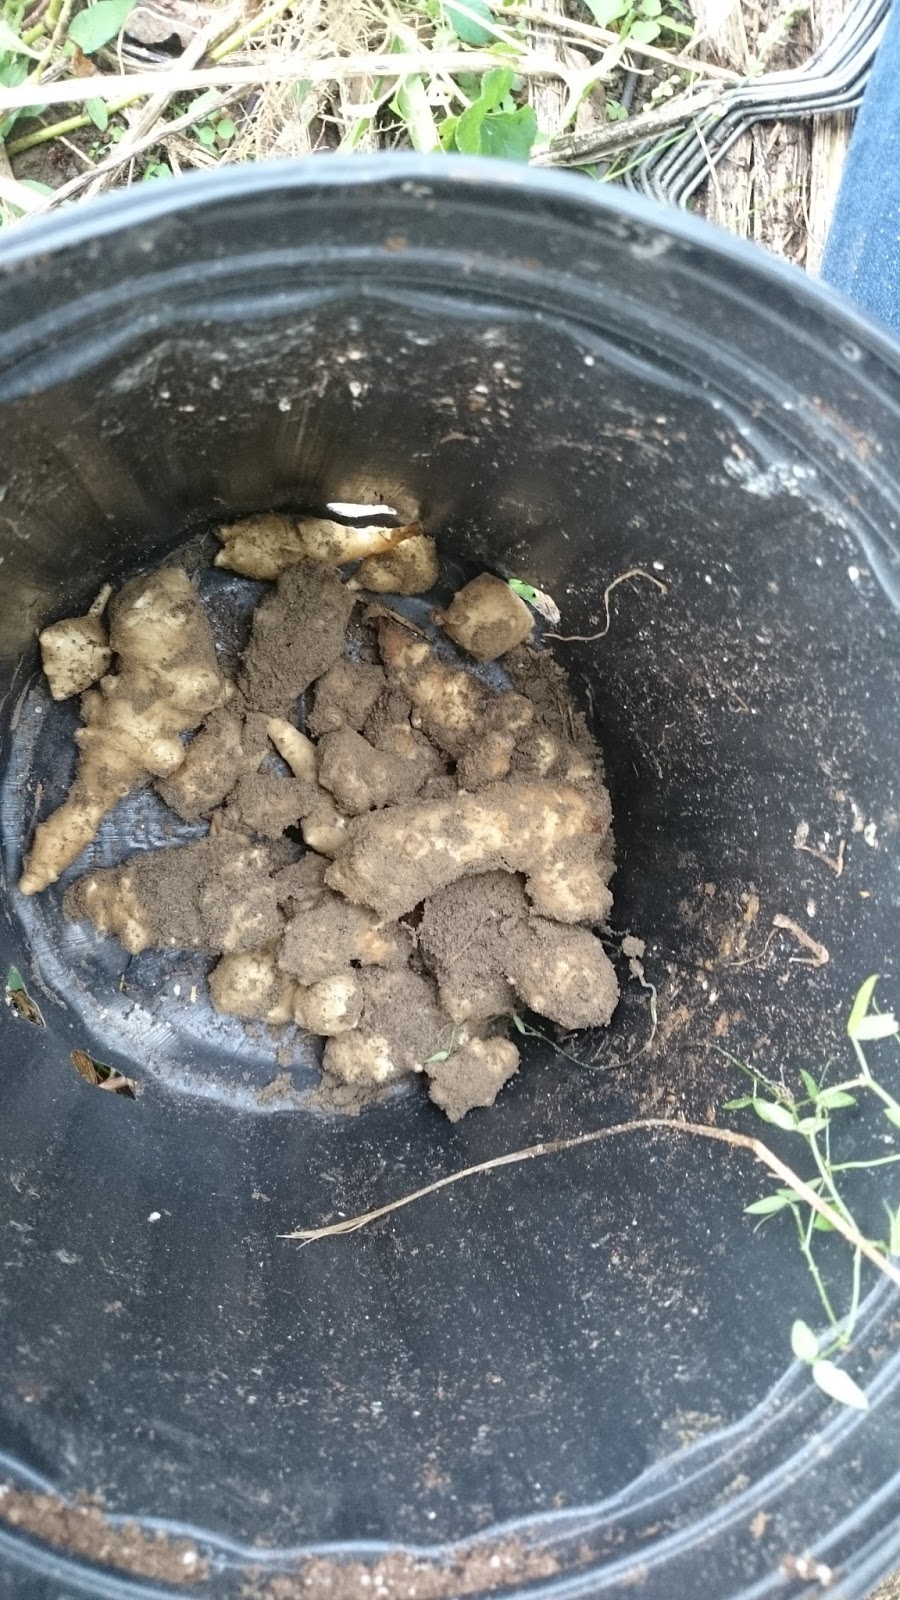
Fruit and Veggie Scraps- cooked or raw is fine - Add a bit of dry items, such as a handful
 of leaves or sawdust to keep the moisture levels down.

Grass clippings - like the sawdust add in layers so that it doesn't mat, clumps slow down

 the process. 

Plants- dead or just pulled are fine, but make sure that any weeds have not gone to seed,

 no point in giving them a great place to germinate.

Manure- Chicken and Horse can be used but should be in a newer compost, one that hasn't aged.

 This manure will need to age a bit to be safely used around plants. Alpaca poop can be added anytime.

Coffee grounds and Tea, including the filter and bags, in moderation. Worms love coffee

 grounds so they are good for Vermicomposting too! Regular household amounts are fine, but if 
you are collecting grounds from work or in large quantities you might want to limit the grounds total
 to a quarter of the total pile.

These Items add Carbon to the Compost:


Yard Waste such as Leaves, Branches, Bush Prunings are great to add to your compost as dry items,

 and work best when either shredded or chopped into small pieces. They decompose at slower rate
 but the smaller the pieces the faster the process.

Straw, Pine Needles and Hay, are also good sources of carbon but make sure that you are using a hay

 that doesn't have seeds, you might end up with a crop of grain.

Paper and Cardboard when added to compost should be shredded or at least torn into small pieces.
This will help keep it from clumping up. Avoid using the colored/shiny Ad inserts, they don't break down
as quickly as normal newsprint, so just add them into the normal recycling bin.

Do you have a wood worker in the family, like me? Saw Dust is something that can be added but my

 advise is to add it sparingly or in thin layers so it won't clump. Kinda like cat litter is supposed to do
 when it gets wet.
 I will say we use  sawdust pellets in the chicken coops that soaks up wet droppings and goes from pellet
 to dust. When we turn the piles we always add a few shovelfulls to our compost, it's a good solutions for 
keeping new pellets in the coops and disposing of the old a bit at a time.

To round out this list, I'm adding one of my favorite options, Dryer Lint. Yes you read that right. 

We normal laundry contains mainly natural fibers, and as much of as I do I hate to throw it away.
So go ahead and add it right into the compost!

So we've talked about the science of composting, the equipment needed and what can safely go into
compost,the last installment on composting is what to do when it doesn't seem to working out the
way you had hoped. 

I've been cleaning up and getting the Jerusalem Artichokes pulled and canned, this week. 
Be on the look out for more information and a great recipe for these old fashioned treats!

Thanks for stopping by!


Monday, December 7, 2015

Apple Cider Stop

I have been up to my ears in Holiday Shows, Church Bazaars and now this weekend it was an  Art Walk. First let me say I had a really great time, we were stationed outside of the Art Center and we met a ton of very nice people, got lots of compliments and had a great many laughs.

But the lead up to this is where my challenge started. We had attended a Festival in the same town earlier in September and they had asked if we would like to have a "Cider Stop" at their Holiday Art Walk in December. I checked our calendar and amazingly enough I was free, so I agreed. Fast forward to the last week in November and I'm stressing about having a perfect cider. I mean if I want you to buy my Jams and Spreads I should be able to impress you with my "free cider"..right?

So I do what everyone else does and I click over to Pintrest.. I can say I found a few recipes, but nothing really seemed like what I wanted, along with a another half dozen pins that  had nothing to do with what I was looking for nor will I ever get a chance to accomplish a third of them. So then I do what I should have done to begin with, I called my mom. I mean after all she makes a mean cider. I mean seriously, It's my favorite holiday smell, some people love trees and greens, or pumpkin pies, not me it's apple cider all the way. 

It's so awesome I'll share it with you. My mom does her's on the stove and lets it simmer all day, hence the holiday love of that scent. I was going to be a bit more mobile so I did mine in a crock pot.
I used our small version, I'm fairly sure it's the 3qt version. 


I took about 1/2 gallon of White House Apple Cider but really any would do.
Added a sliced clementine, two sticks of Cinnamon and in that strange looking contraption at the top I added  four whole cloves and a couple whole allspice.  You could use cheesecloth or a tea strainer, just because it's best to take them out if the mixture will boil or be on the heat for an extended amount of time since the spices can be overwhelming. 

After the cider was hot I transferred about 2/3 to a thermos and refilled the crockpot, leaving the oranges and the spices to mull another batch. 

If you are interested in the spice holder that we use, it's actually a Fresh Food Feeder, found in the baby department. We use it quite a bit in our canning. it's easy to clean and best of all it's reusable.

The Cider was a huge success, there were lots of guesses as to what went into it and I heard later that customers commented on it all around the area. The sale went well too, could I attribute that to the holiday atmosphere or the awesome cider. Try it yourself and let me know what you think...

Here's hoping that your holiday is filled with laughter and lots of great holiday smells..


Thursday, December 3, 2015

Garden Tip Thursday- Types of Composters

Okay so you have decided it is you New Years goal to start composting, I mean really why send all of that good stuff to the dump! It's free and it take a small amount of effort to create something you can really use! Now you need to decide what kind of composter will work best for you. Even if you don't garden, composting a good idea. Anytime something is kept out of the landfill it's a win, and I bet you know someone that would love to have it.

First you need to be realistic about your space availability, plenty of space, great! Only have a balcony or a small patio, that is still workable, no need to give up on your dream of having compost or a garden for that matter. Three 5 gallon buckets or a kitty litter pails will make a great composter for very small spaces. Drill small  holes into one of the buckets and then place it into the other bucket. The bottom bucket will act as collection for your run off and keep your balcony or patio clean. Put both buckets into the third, it's storage right now. After a week or so you can take the empty bottom bucket and dump the top bucket into it, instant aeration and mixing. Clean out your bottom bucket and place it back on the bottom for storage. You'll want to start with a layer of straw or leaves and then you can add your veggies.

If you are okay with worms, then think about a vermicomposting. That can be done small scale right in your kitchen or with a larger composter with layers. It's not as yucky as it sounds and works out great for you and the worms. Back in April I had a post about composting with worms, so you can get the details there. There are DIY options with bins and purchasable units that fit right into your landscape.
This is one we have and it expands, during the warmer months we add more trays when they are very active and take them out when the weather cools a bit.

Have a bit more space then try one of these options. Stationary or Tumbler. Still compact for those who might have a bit more room but don't have a ton of waste. We use these for house waste, well the stuff the chickens can't or shouldn't eat and we have a large free standing bin for yard and garden waste. 

This a a great free standing version, we had this over by the garden and this spring we thought we would move it over by the chicken coops, for convenience.  This one was easy to assemble, was a great price but is hard to stir, easy access to the bottom to take out compost, 


This our tumbling composter. They come in all different styles and sizes, best for homes with small amounts of compostable materials. Easy to use but more difficult to remove the compost once it's ready. You can see the small door on the top, drop in your wastes give it a good push, it rolls around on the base. Easy to hide in your landscaping if you are in an area that frowns upon things in the yard! Here's a great link to show you all of the choices in tumblers.

Of course if you have the area or have lots of waste there are always the large compost bins. Ours is just a three sided box made from old logs, we use it for limbs, garden wastes and grass clippings, with the occasional dump of chicken litter and horse manure. At our house this is a constantly growing pile. We built it up in the back and on the sides with a low front for easy of turning. Types of compost bins vary as widely as the people who make them. My father in law had one he made with chicken wire and tomato stakes. You are only limited by your imagination, just make sure it can breath, doesn't sit in water and can be stirred occasionally. Some are multiple bins so that waste can be turned into the next slot as it ages and new can be started, so you always have a pile in process. Rodale organic has a very easy to follow plan for a three bin here.

No matter what kind of compost you create or how you compost it, you'll still need to know what can and can not be composted. Check back next week and I'll have a great list and some ideas for you.
WE have lots going on this month, we'll be participating in a local Art walk as a Cider Stop as well as selling our Jams, so I've been working on the perfect cider recipe, and we've dug up some of our Jerusalem Artichokes and I've got some great ideas for that gardener on your Christmas list coming up. So check back and see what else is going on around Our Greene Acre!